A small kitchen island with a sink works when the footprint stays narrow enough to keep both walkways clear and the basin itself stays compact. The difference between a prep station you actually use and one that blocks traffic usually comes down to depth: 24 to 30 inches still leaves room to rinse a colander without brushing the refrigerator. Designer Clara Jung proved this with a long, thin island that dropped in a prep sink and still extended into a dining ledge, turning the tight dimension into the feature rather than the compromise.
1. Use a Wine Table as an Island
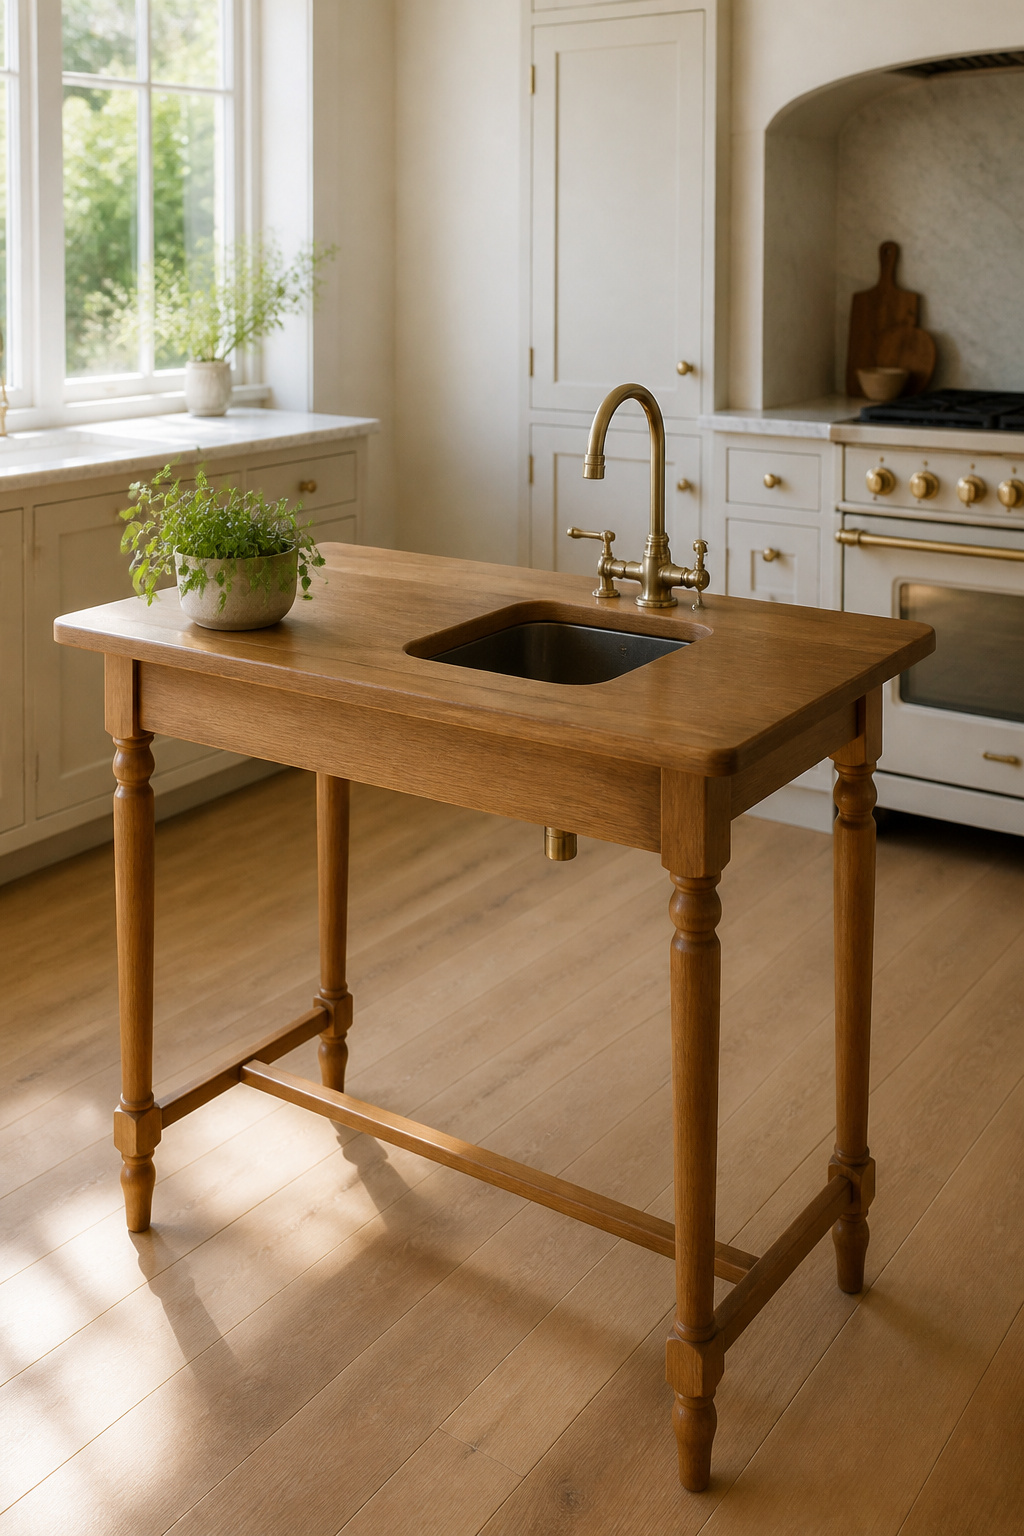
A narrow wine table can serve as a compact kitchen island with a sink when floor space is tight but the layout still needs a dedicated prep zone. Designer Jeanne Barber has used a small French wine table this way, trading the bulk of a traditional island for something that can tilt or stow when entertaining calls for more open floor space. The piece gives you extra counter surface and a spot for morning coffee without committing the room to a fixed footprint.
For a sink to actually function here, the table needs to hit at least 48 inches in length; anything shorter and you lose the landing space that makes rinsing fruit or filling a pot practical. Since wine tables were never built for plumbing, adapting one means routing supply and drain lines through the legs or adding a skirt to hide them. A compact bar sink, typically 9 to 15 inches wide, keeps the scale right and handles light tasks without pulling you back to the main kitchen. The tilting top some of these tables carry becomes a genuine advantage in a rental: stow the leaves, roll the piece aside, and the floor plan opens back up when you need it to.
Recommended Products
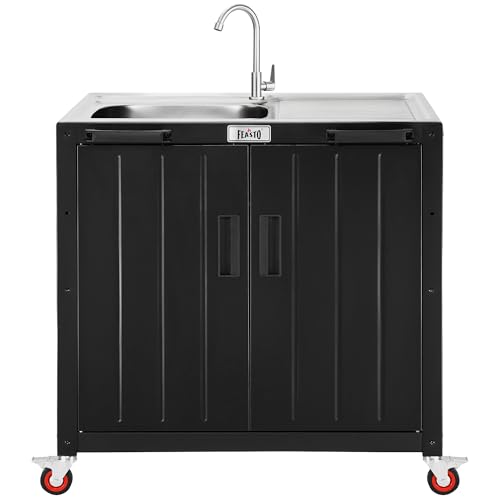
Grill-Side Prep Station: Never leave the grill while cooking. This all-in-one sink station combines a spacious countertop and a deep 6.3" sink right beside your grill—perfect for rinsing ingredients, washing hands, or cleaning tools on the spot. From prep to cleanup, everything stays efficient and uninterrupted. It's also designed for food washing, garden cleaning, or utility use—adapting easily to both outdoors and indoors

Versatile Fit: Specially designed to fit the FEASTO kitchen island series, this grill island cover fully encloses the island for form-fitting protection. Please measure your kitchen island carefully before purchase to ensure the best fit

Built-In Cold Drink Fridge: This ROVSUN grill cart features a dedicated refrigerated area to keep beverages perfectly chilled while you cook. No more running inside for cold drinks or filling coolers with melting ice. Store beer, soda, or water right at your prep station—ideal for hot summer barbecues, garden parties, or all-day tailgating events
2. Go for Stainless Steel With Shelving
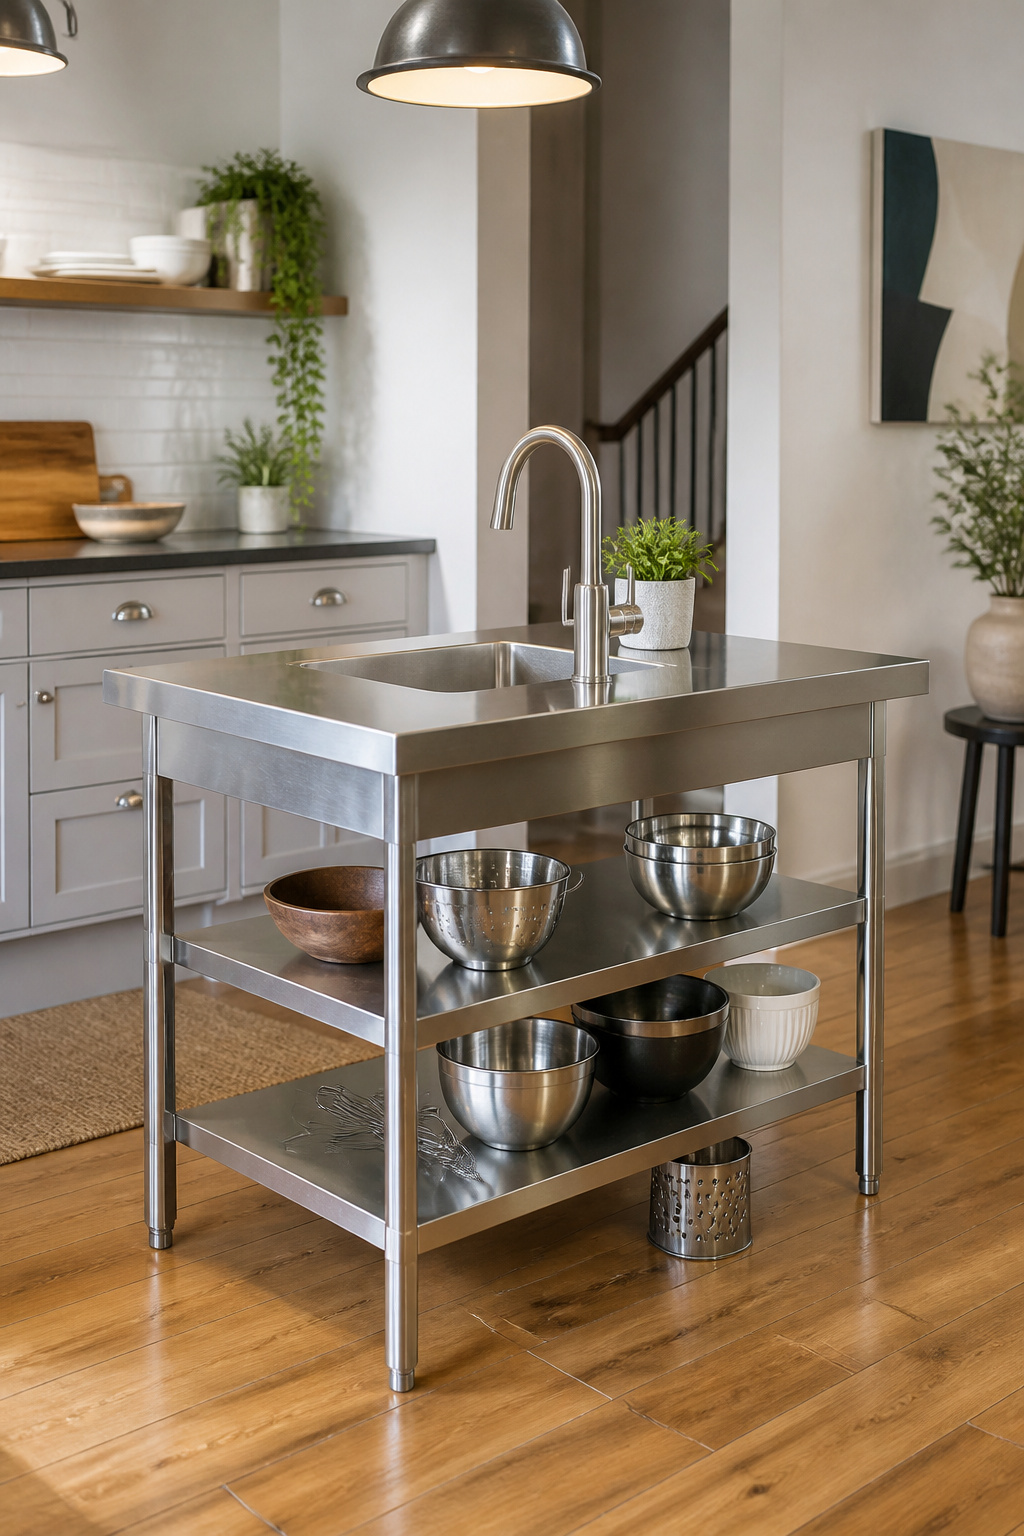
Stainless steel shrugs off the things that ruin wood in a kitchen: water rings from a dripping colander, a hot pan set down without a trivet, tomato sauce wiped up an hour too late. In a small space where every surface gets used hard, that durability matters more than it would in a show kitchen twice the size. The industrial look reads intentional rather than makeshift, which helps when the island is basically a worktable parked in the middle of the room.
Built-in shelving underneath is where this idea earns its square footage. Three tiers of open storage, as one designer used, keep mixing bowls and sheet pans within arm’s reach of the sink without the bulk of closed cabinets. The shelves add function without widening the footprint, which is the constraint that rules every other decision in a compact kitchen. Wheels underneath turn the same unit into something you can roll aside when you need the floor space for a project that does not belong in a kitchen at all.
Recommended Products
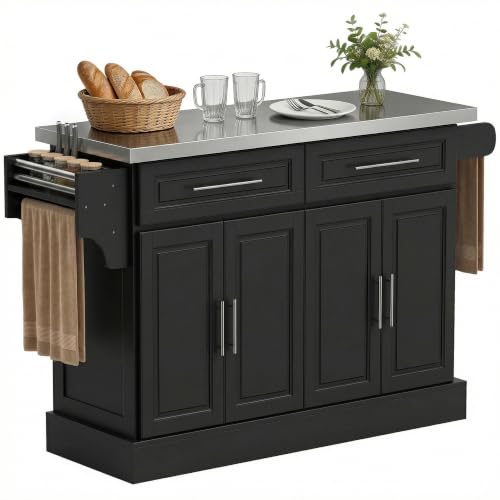
Effortless Food Prep: The stainless steel countertop of this kitchen island on wheels provides a smooth and safe surface for all your chopping and cutting tasks. Cleanup is a breeze, as a simple wipe with a kitchen towel or cloth leaves it spotless and ready for your next culinary adventure
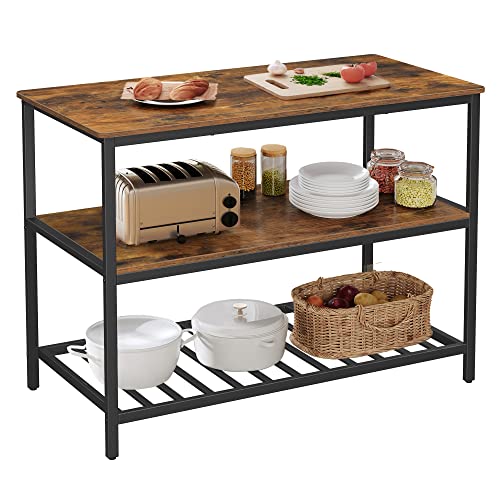
[Large Worktop] The 23.6”D x 47.2”W surface of this kitchen island allows you to prepare food while being spacious to keep a toaster or coffee machine close by. Large worktop for great convenience!

Solid wood top for increased durability and longevity contrasts with the clean white finish seamlessly; 50lbs (shelf); 5lbs (drawer); Assembly Required Yes; Capacity 100lbs (top); Warranty 30 days limited; Construction Material Solid wood; Country Of Origin Thailand; Dimensions 20?W x 40?D x 36.5?H
3. Embrace a Narrow Footprint
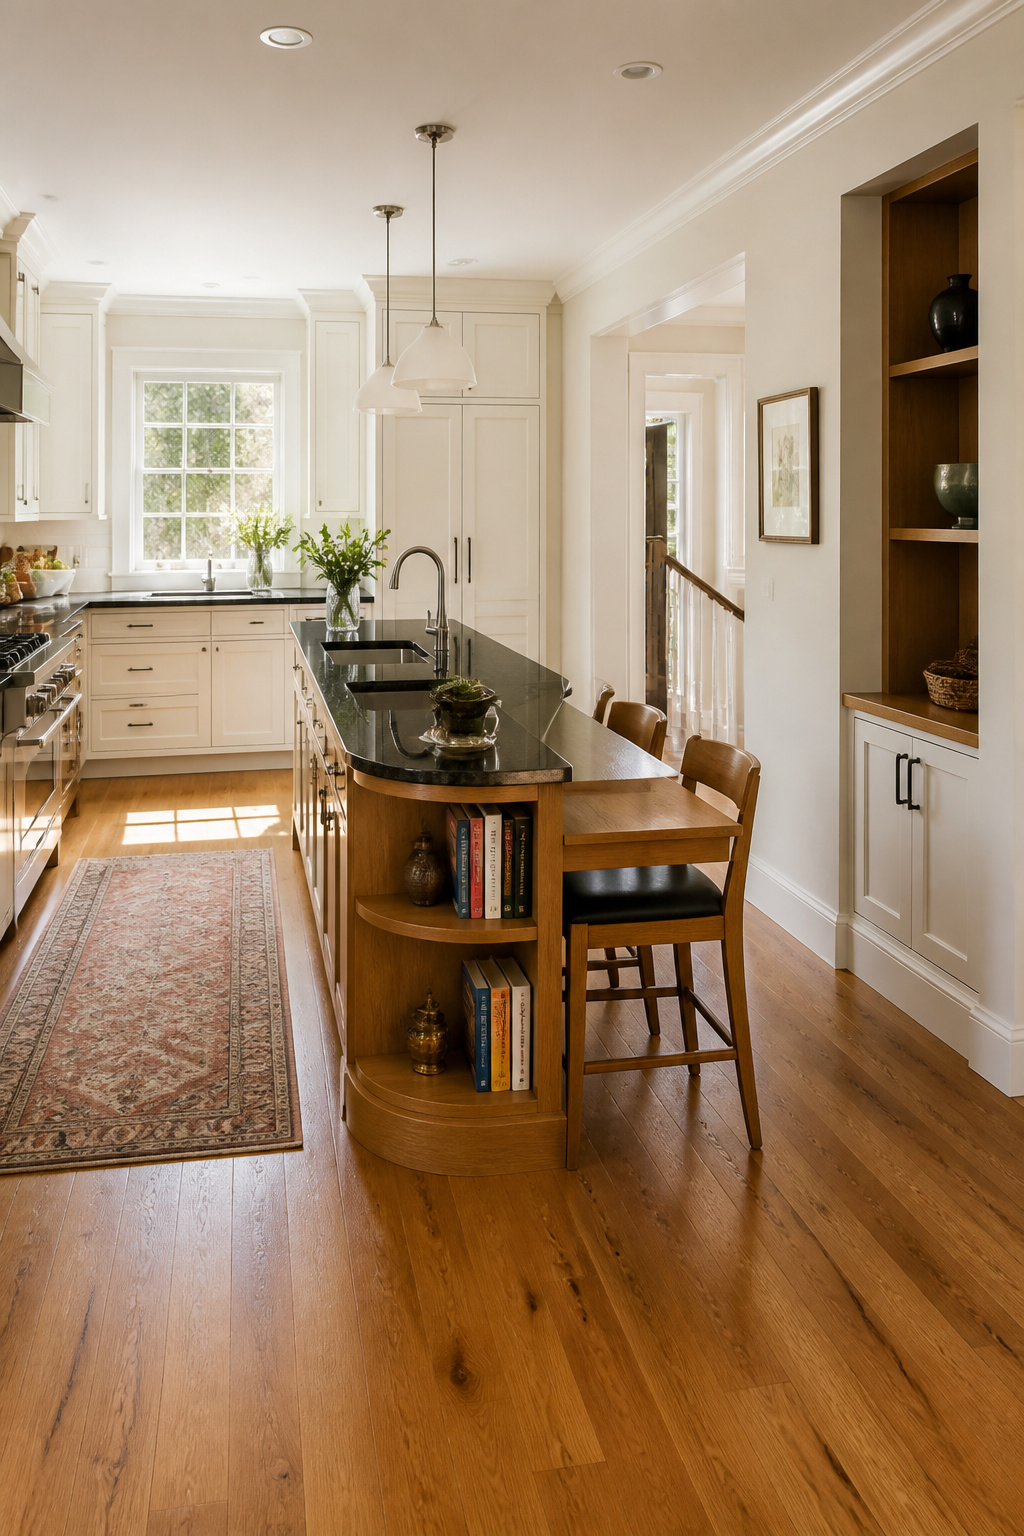
A standard island runs 42 to 48 inches deep, but 24 to 30 inches still leaves room for a prep sink and keeps both walkways open. The basin itself only needs 15 to 18 inches of width, so the remaining counter handles a cutting board and the bowl of tomatoes without crowding the aisle.
Clara Jung faced this exact squeeze, a narrow footprint where moving one wall had not solved enough. She ran the island long and thin, dropped in a prep sink, and let the same surface extend into a small dining ledge. The tight dimension became the feature rather than the compromise.
The trick is keeping the sink compact enough that the island still reads as prep space, not a plumbing island with a rim of counter around it. A workstation sink helps here, the kind with built-in ledges for a colander or cutting board that sits level with the rim. The accessories collapse the need for extra surface area beside the basin, which matters when every inch of depth is guarding a 36-inch walkway on each side.
Recommended Products

Add Style to Your Home: This 3-tier rolling kitchen island is built in a rustic farmhouse style with beautiful white pine and engineered wood, a stylish stainless steel top, 4 smooth casters, and ample storage and shelving.

VERSATILITY: YITAHOME stainless steel workbench is suitable for the kitchen, garage, workshop, bar, restaurant, laundry room, school, hospital, warehouse and other places that accommodate for workbench, dinner table, laundry table. NSF certified

High-Quality Stainless Steel: This work table, measuring 30 x 18 x 38 inch, is made from SUS201 stainless steel for the tabletop, shelves, and legs. It offers superior rust resistance, a sleek appearance, and a smooth surface that is easy to clean with a simple wipe. It meets strict public health standards, ensuring long-lasting protection for your health.
4. Repurpose a Base Cabinet
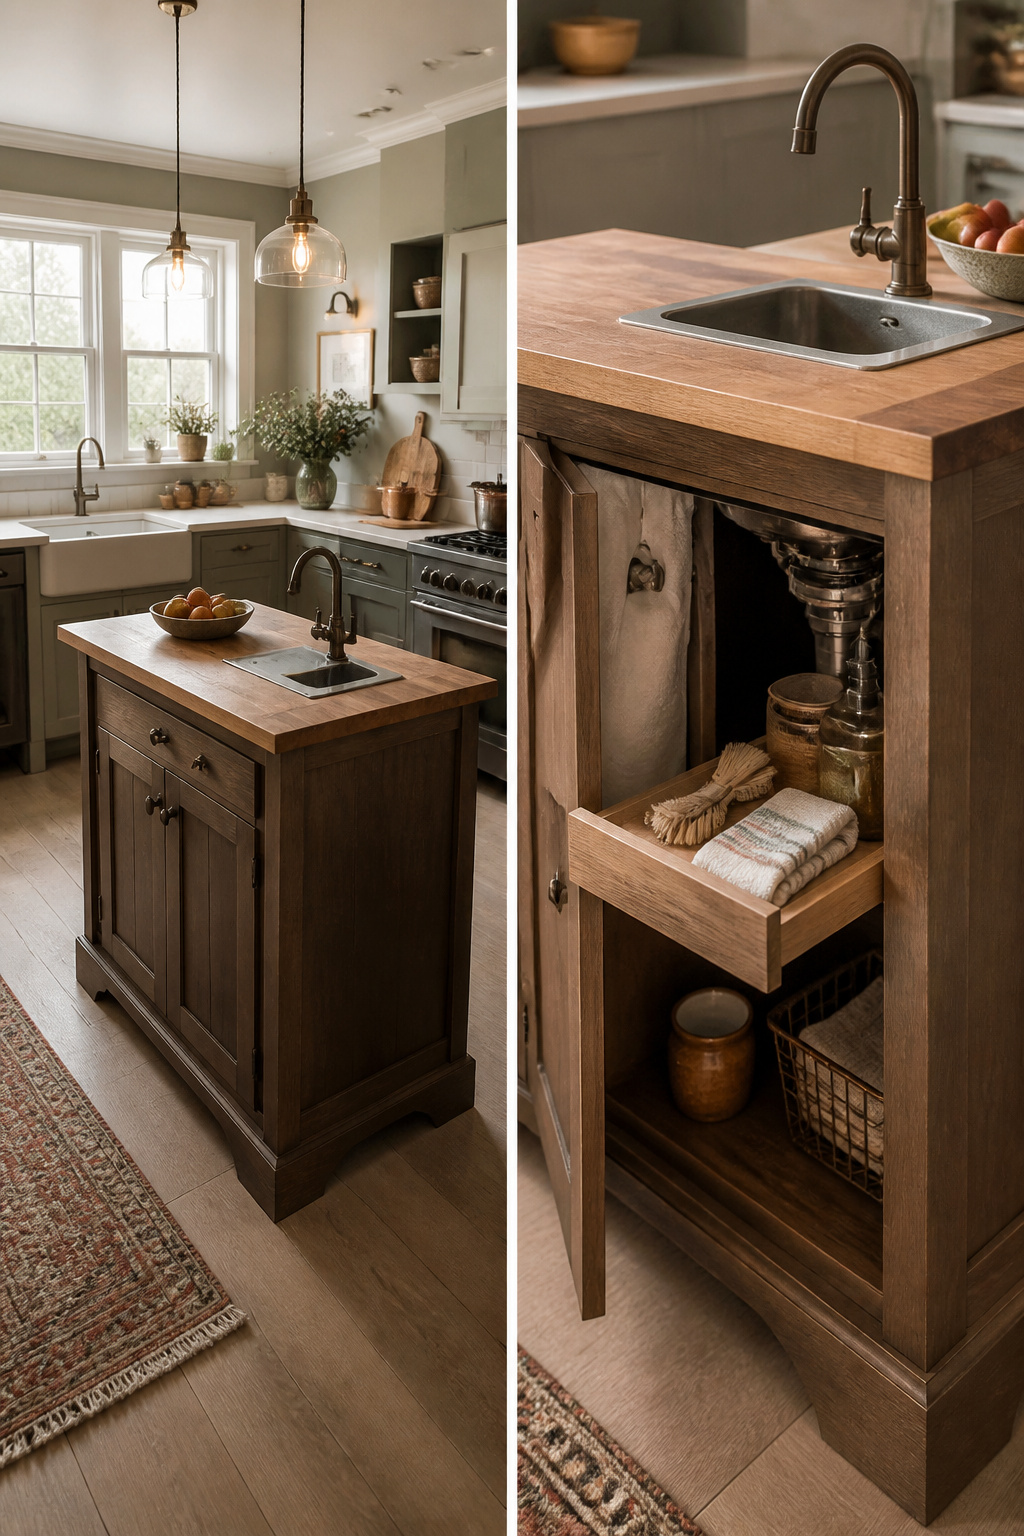
A standard 24-inch or 30-inch base cabinet from a big-box store costs a fraction of what custom island builders charge, and it already has the box, the toe-kick, and the face frame built. The trick is turning that wall-bound unit into something you can stand on all four sides.
You will need to cut the back panel out entirely so plumbing can run up from the floor, then reinforce the corners with L-brackets because the back rail is gone. The exposed sides get finished with 1/4-inch plywood or matching laminate panels, attached with finish nails and adhesive. For the sink cutout, trace the template, drill a starter hole, and run a jigsaw blade just inside the line; the countertop overhang hides any wavering. A butcher-block top from the same store runs about a third of quartz, and you can sand out the inevitable scorch mark later instead of living with it forever.
The real savings come from skipping the custom cabinet shop entirely. Their quote for a matching island shell often runs four to six times the off-the-shelf price, and they are ordering the same box from the same manufacturer before they mark it up. The tradeoff is your weekend for their markup, which, on a tight kitchen budget, is usually the right swap.
Recommended Products

Single Handle Design: Pull-out sprayer faucet with single handle for easy use

Compact Prep & Bar Sink - Ideal as a small RV sink, compact island sink, small kitchen sink - perfect for prep, rinsing, and space-saving use

Perfect Fit for Your Space -This undermount kitchen sink is designed for small kitchens, wet bars, and islands. This single bowl design fits tight spaces while maintaining practical depth and usability
5. Add Bistro Counter Stools
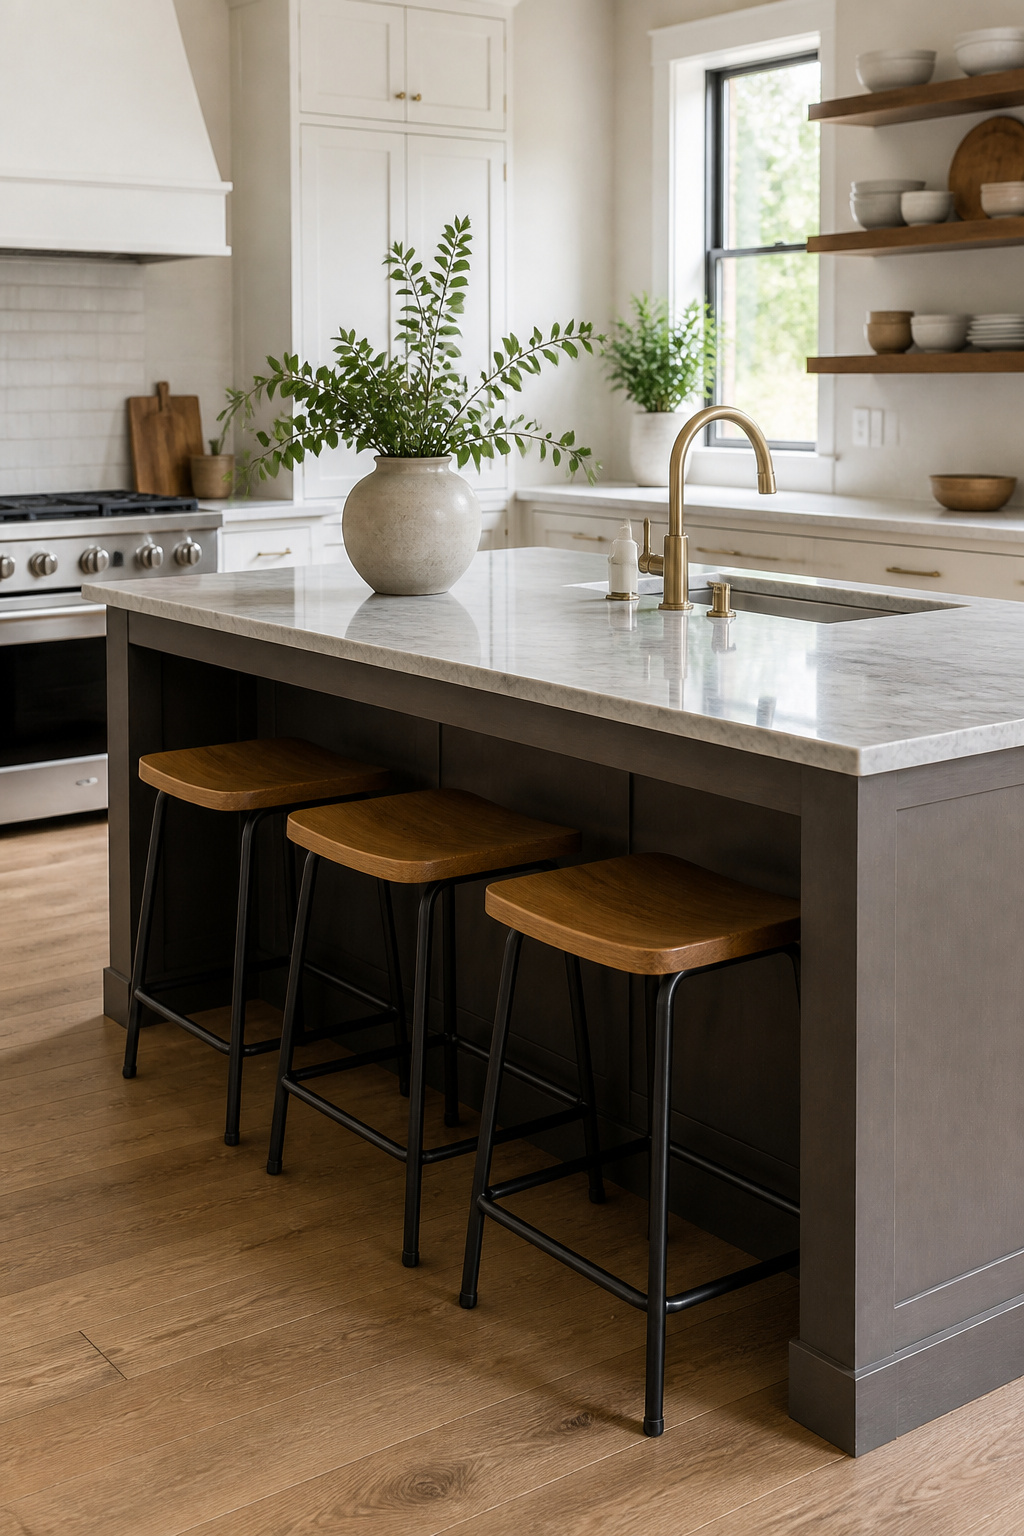
Backless bistro stools slip almost flush beneath an overhang, which matters when your aisle is maybe 36 inches and every inch counts. The seat height you want is 24–26 inches for a standard 36-inch counter, though I have seen people buy 30-inch bar stools by accident and spend a year bumping their knees. Leg placement is the detail that separates the ones that work from the ones that look right but fail: splayed legs that angle outward need more toe room than a straight post design, so a four-legged stool with legs that kick out wider than the seat will force you to stand farther back to sit down. In a tight kitchen that subtle shift means the person behind you is now in the refrigerator zone. I would pick stools with legs that stay under the seat line or a single central pedestal, and test the pull-out motion before committing. Low-profile seats without arms or heavy backs keep sight lines open too, which does more for the feeling of space than the footprint alone suggests.
Recommended Products

All-in-One Convenience: The integrated sink lets you rinse ingredients, wash hands, and clean tools right beside the grill, keeping outdoor cooking smooth and uninterrupted.

Rock Solid Material: Material: stainless steel; Table Legs Diameter: 1.9 in; Upper layer thickness: 3 in; Lower layer thickness: 1.6 in. Our food prep table is constructed of stainless steel, with surface drawing treatment, offering excellent corrosion resistance, durability, ease of cleaning, and can deliver long-lasting performance.
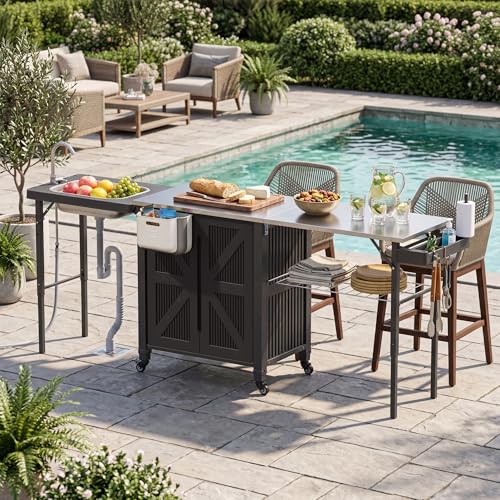
【3-in-1 Outdoor Grill Station with Sink】This innovative outdoor grill cart combines an outdoor cooking station, outdoor kitchen island, and outdoor storage table in one. Features a foldable sink with a built-in faucet, making it easy to wash food, fruits, and utensils while cooking outdoors. Perfect for upgrading your outdoor cooking station
6. Add Storage on Both Sides
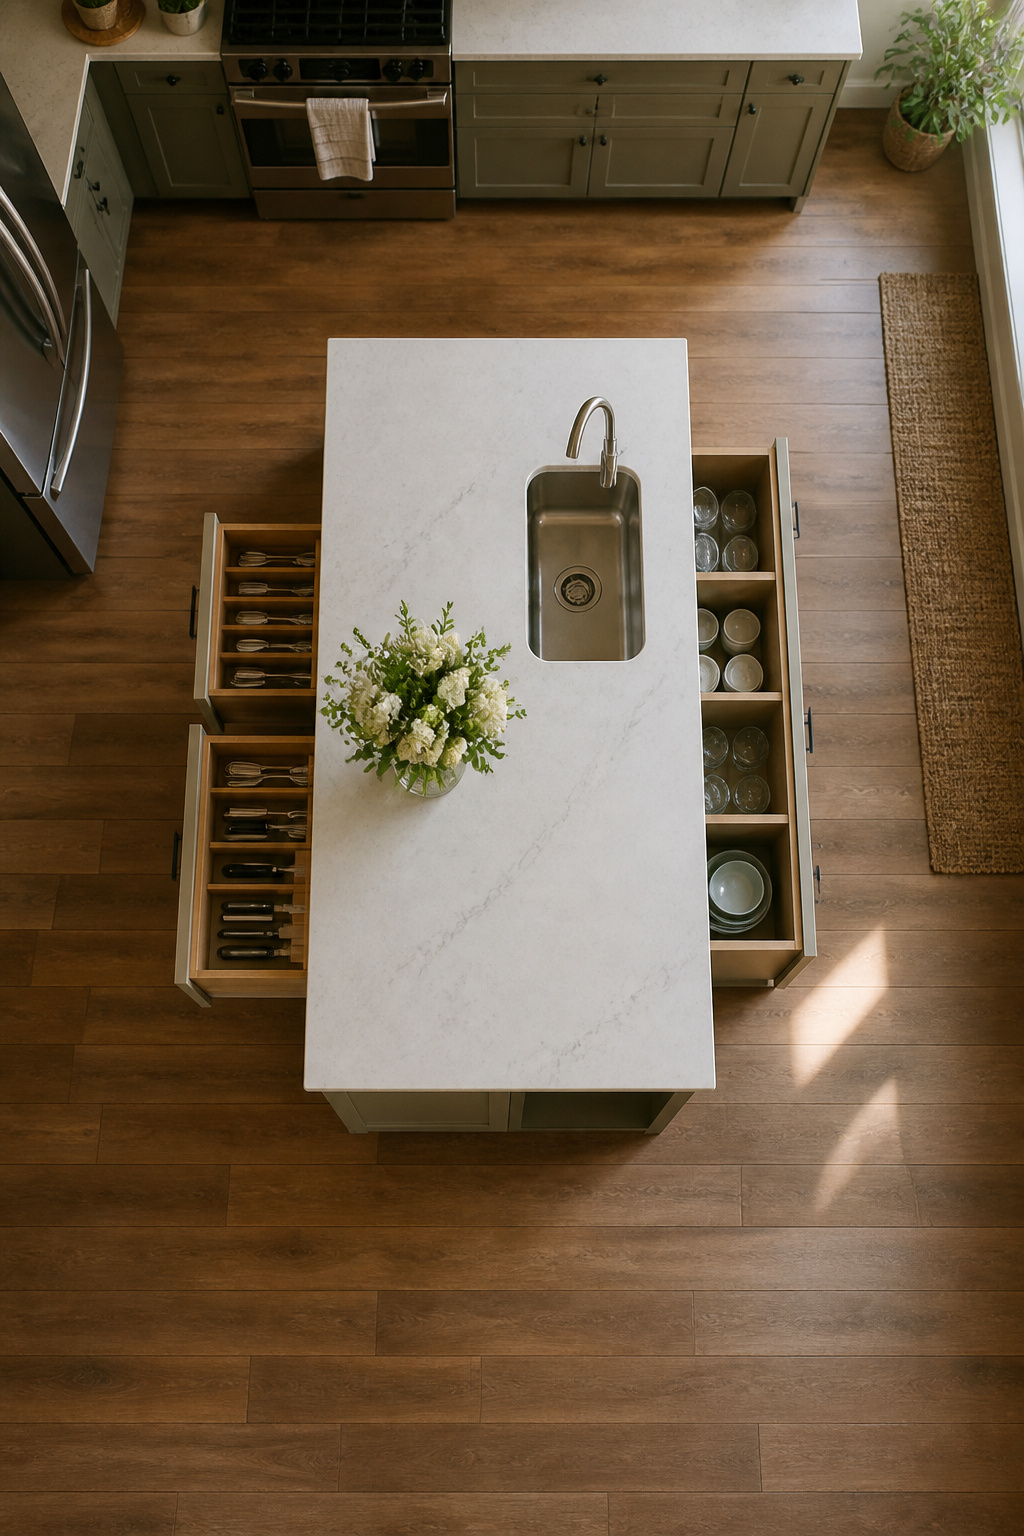
A double-sided island flips the usual storage math. On the kitchen side, drawers and cabinets keep pans and utensils within arm’s reach of the sink. Flip around to the dining side and you get open shelves for everyday dishes, or a shallow rack that holds wine bottles horizontally. That second face is what sells the idea, but it also costs you depth.
The usual rule of thumb for a small kitchen island with sink ideas is a 24-inch base cabinet plus a 12-inch overhang on one side. Add a second working face and you need at least 36 inches of total width, often 42, to keep both sides functional. Anything narrower and the drawers on the kitchen side end up too shallow to hold a full skillet, or the wine rack becomes a single row that holds four bottles and calls itself storage.
I would skip the wine rack entirely in a kitchen under 120 square feet. Open shelves facing the living area collect dust and demand styling; a false panel or a slim towel bar gives you the same finished look without the upkeep. The drawers facing the stove are where your money goes. Put the depth there, and let the public side of the island stay quiet.
Recommended Products

Premium Powder-Coated Aluminum Construction-Built with durable powder-coated aluminum panels, this outdoor kitchen island is designed to resist rust, corrosion, and fading, ensuring long-lasting performance in all weather conditions.
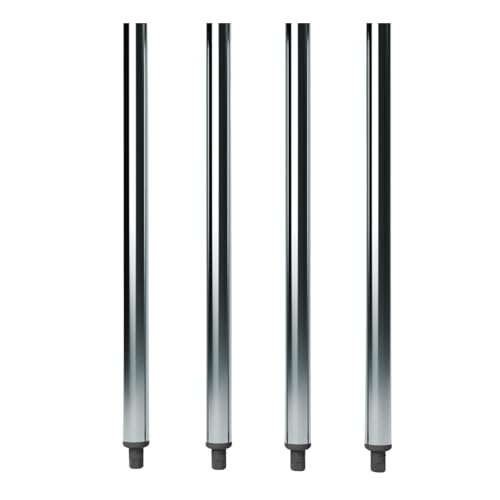
SET OF 4 WORK TABLE LEGS: A complete set of four 24 in. galvanized steel legs to build or replace the base of a commercial work table, prep table, or workbench.

All-Purpose Kitchen Prep Table for Your Grill - Get ready to create amazing meals with this tough outdoor kitchen island. The stainless steel top is huge (20" x 42"), perfect for prepping food for your grill, supporting a pizza oven, or just rolling around as a BBQ cart. Best part? The smooth surface wipes clean in seconds.
7. Deck It Out in Blue
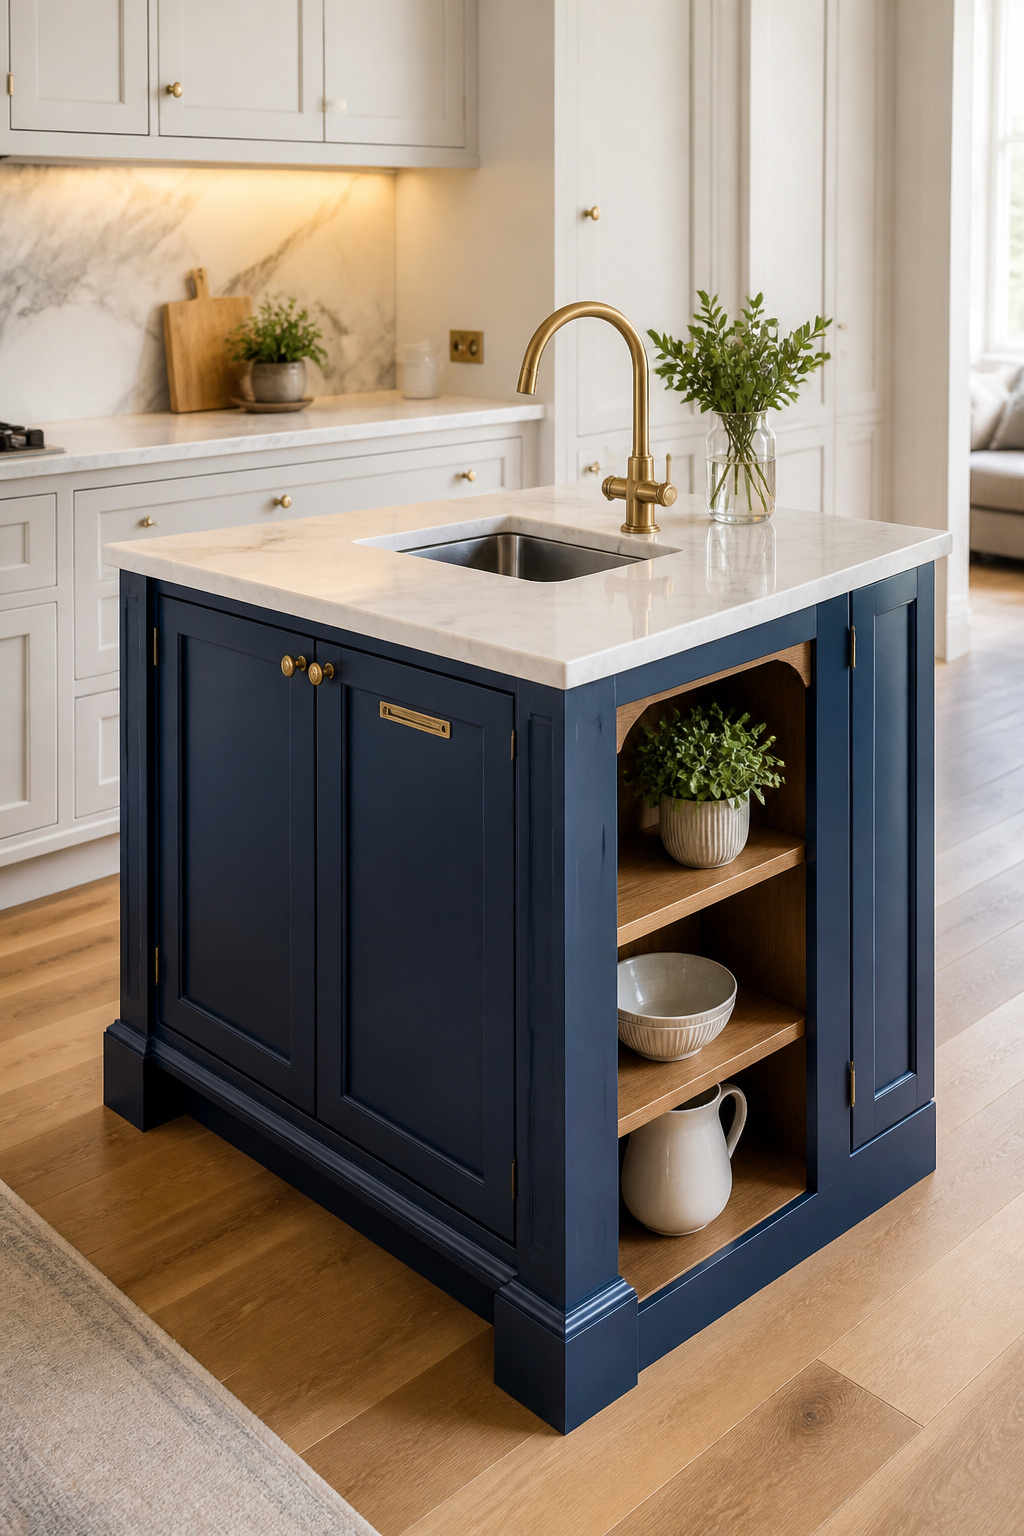
A bold color on the island base turns the piece into furniture instead of more cabinetry. In one small kitchen, the designer treated the island like a standalone piece with legs, intricate wood detailing, and a blue countertop that pulls focus to the center of the room. Paint gives you that flat, saturated look and lets you match or clash with the rest of the kitchen on purpose. Stain reads warmer and shows grain, but it stays closer to wood-tone territory and can still feel built-in. For a renter or anyone who wants the island to look like something they rolled in themselves, paint wins. A daring blue or another solid hue against white or neutral cabinets makes the island look chosen, not inherited. The sink still does the work, but the color does the talking.
Recommended Products

[Machine Washable Kitchen Runner Set]: Looking for washable kitchen runners that are easy to maintain? This 2-piece machine washable kitchen floor mat set is designed for sink areas, stove zones, and long prep spaces. Wash cold on a gentle cycle and line dry for simple everyday care.

ALL-IN-ONE SPACIOUS STORAGE: Corroborating two different-sized drawers for daily-used culinary tools like plates and silverware, a 3-door cabinet and a side storage rack for food, bottles, and jars, this kitchen island on wheels embraces the charm of accommodating all your kitchenware and make the most use of your space

[Large Worktop] The 23.6”D x 39.4”W surface of this kitchen island allows you to prepare food while being spacious to keep a toaster or coffee machine close by. Large worktop for great convenience!
8. Use a Hanging Countertop for Extra Space
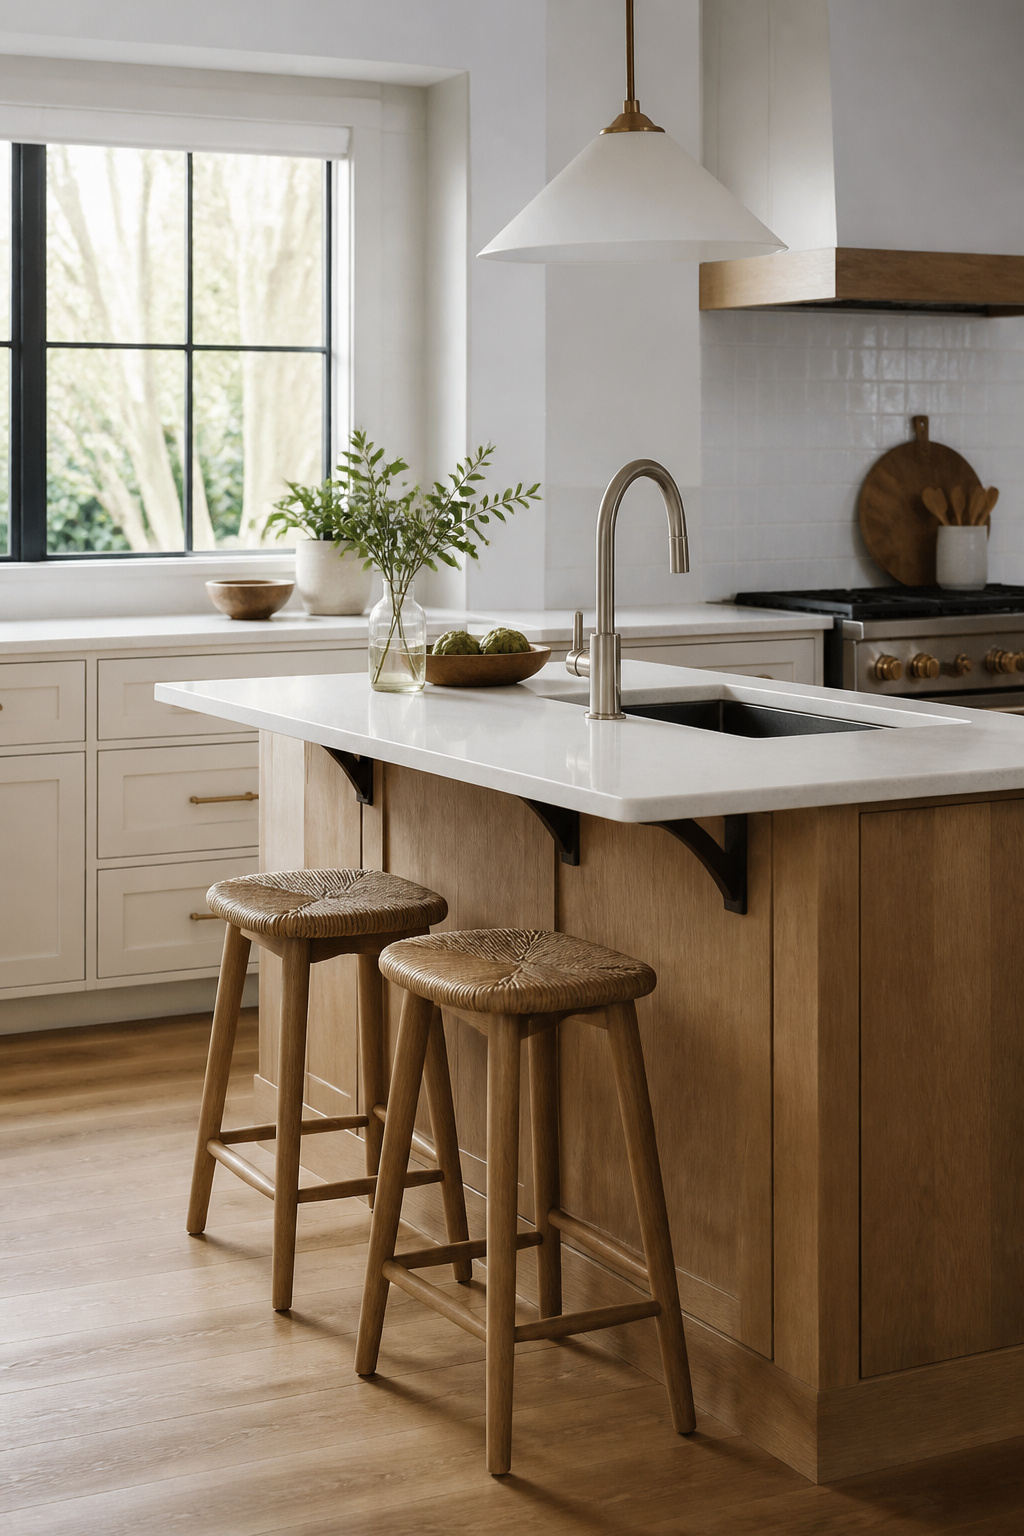
A hanging countertop lets you steal breakfast-bar seating without the island depth that usually demands it. The slab extends past the base cabinet on one side, typically 12 to 15 inches, which is just enough knee room for a stool tucked underneath. The island itself stays compact, often running the same depth as your main counter run, while the cantilevered lip does the seating work.
What convinced me, reading through a dozen of these setups, is how the overhang behaves differently depending on which side it lives on. Run it along the back of a sink island and you get a rinsing station with a place to park and dry dishes. Face it toward the living area and it becomes the morning coffee perch, with the cook working at the other side. The dual-height trick I kept seeing, lower counter on the dining face and standard height at the prep side, adds even more flexibility in tight square footage, though a single plane at one height keeps the fabrication simpler and the cost down.
The real limit is structure. Anything past about 12 inches wants corbels or a steel bracket hidden in the base, and your cabinet box has to be built for the load. Skimp on that and the lip sags or cracks where it meets the deck.
Recommended Products

Effortless Food Prep: The stainless steel countertop of this kitchen island on wheels provides a smooth and safe surface for all your chopping and cutting tasks. Cleanup is a breeze, as a simple wipe with a kitchen towel or cloth leaves it spotless and ready for your next culinary adventure

【Durable 2 Layer Design】 -This heavy duty table desktop load capacity is 480 lbs, and the undershelf can carry 380 lbs. Its strong load - bearing capacity can easily carry microwave oven, kitchen utensils or any other tools.Dimension 24 by 48 by 34.7 inches (DxWxH), offer you enough storage room

VERSATILITY: YITAHOME stainless steel workbench is suitable for the kitchen, garage, workshop, bar, restaurant, laundry room, school, hospital, warehouse and other places that accommodate for workbench, dinner table, laundry table. NSF certified
9. Add Drawer Dividers
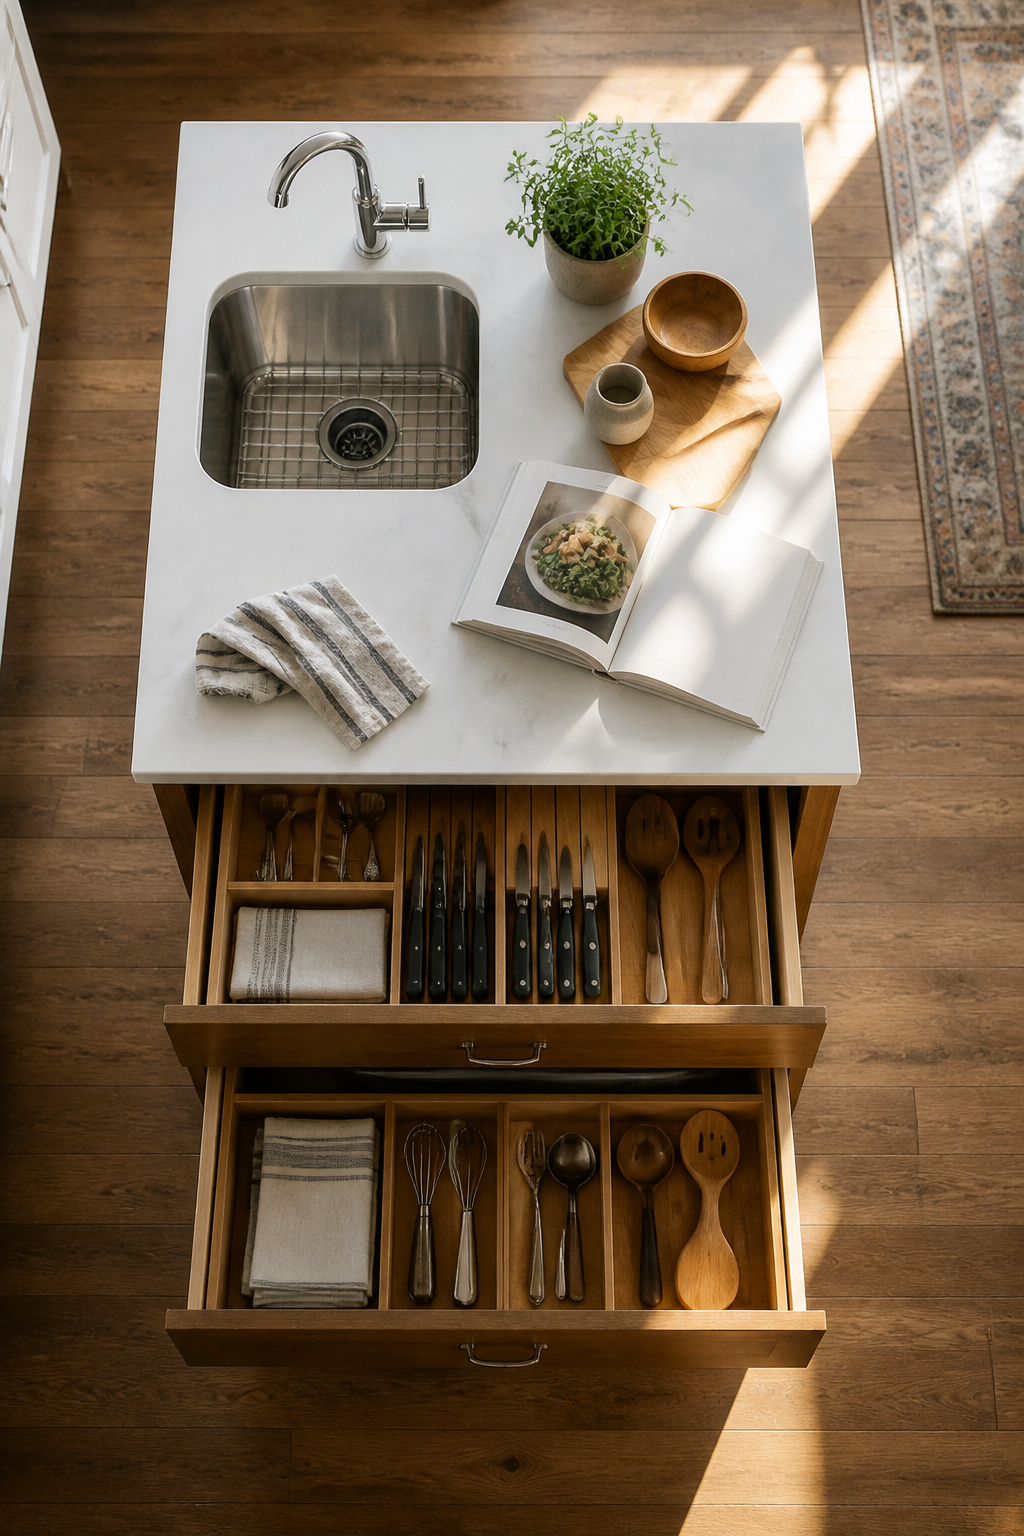
Standard drawer depths run 3 to 4 inches for utensil trays and up to 8 inches for pots, but in an island built around a sink, the P-trap and supply lines chew through the back third of every drawer stack. Plan for 15 inches of uninterrupted depth from the front face, measured before the plumbing begins, and shallow drawers behind that zone become the only usable square footage.
Custom dividers turn those compromised 3-inch trays into something precise. A slotted maple insert for knives, a shallow bin for dish towels rolled flat, a narrow channel for pump soap refills; each one stops the drawer from becoming a jumbled pit the second you open it. The alternative is stock cabinetry retrofitted with a basin, which usually sacrifices one or two full drawers to accommodate the trap and leaves the rest at odd depths that fight every organizer you bring home.
I drew my island layout three times before I accepted that the sink had to sit off-center, shifted toward the dishwasher run, just to keep two equal drawer widths on the cooking side. The cleaning supplies and compost bin landed in the narrower bay, where the plumbing ruled anyway. An integrated build from the start would have let me spec the pipe run to match the storage I actually wanted, not the other way around.
Recommended Products

Perfect Fit for Your Space -This undermount kitchen sink is designed for small kitchens, wet bars, and islands. This single bowl design fits tight spaces while maintaining practical depth and usability

【3D Micro-Bead Texture: Timeless Finish】Uniform pebble-like beads diffuse light to eliminate glare, giving the bar sink a premium, high-end look. This innovative texture disperses daily impacts from glassware and utensils, drastically cutting down on scratches while hiding up to 80% of tiny nicks. Keeps its flawless, like-new look for years

【Designed for Compact Spaces】 Whether you're outfitting a kitchen island, a wet bar, a coffee station, or a small pantry, this 12"x18" sink delivers full functionality without occupying excess space. The narrow 12" length fits into standard 18-inch base cabinets, while the generous 18" width (front-to-back) and 8" depth provide comfortable working room and effective splash control. No custom cabinetry needed—just measure, install, and use
10. Make It Mobile
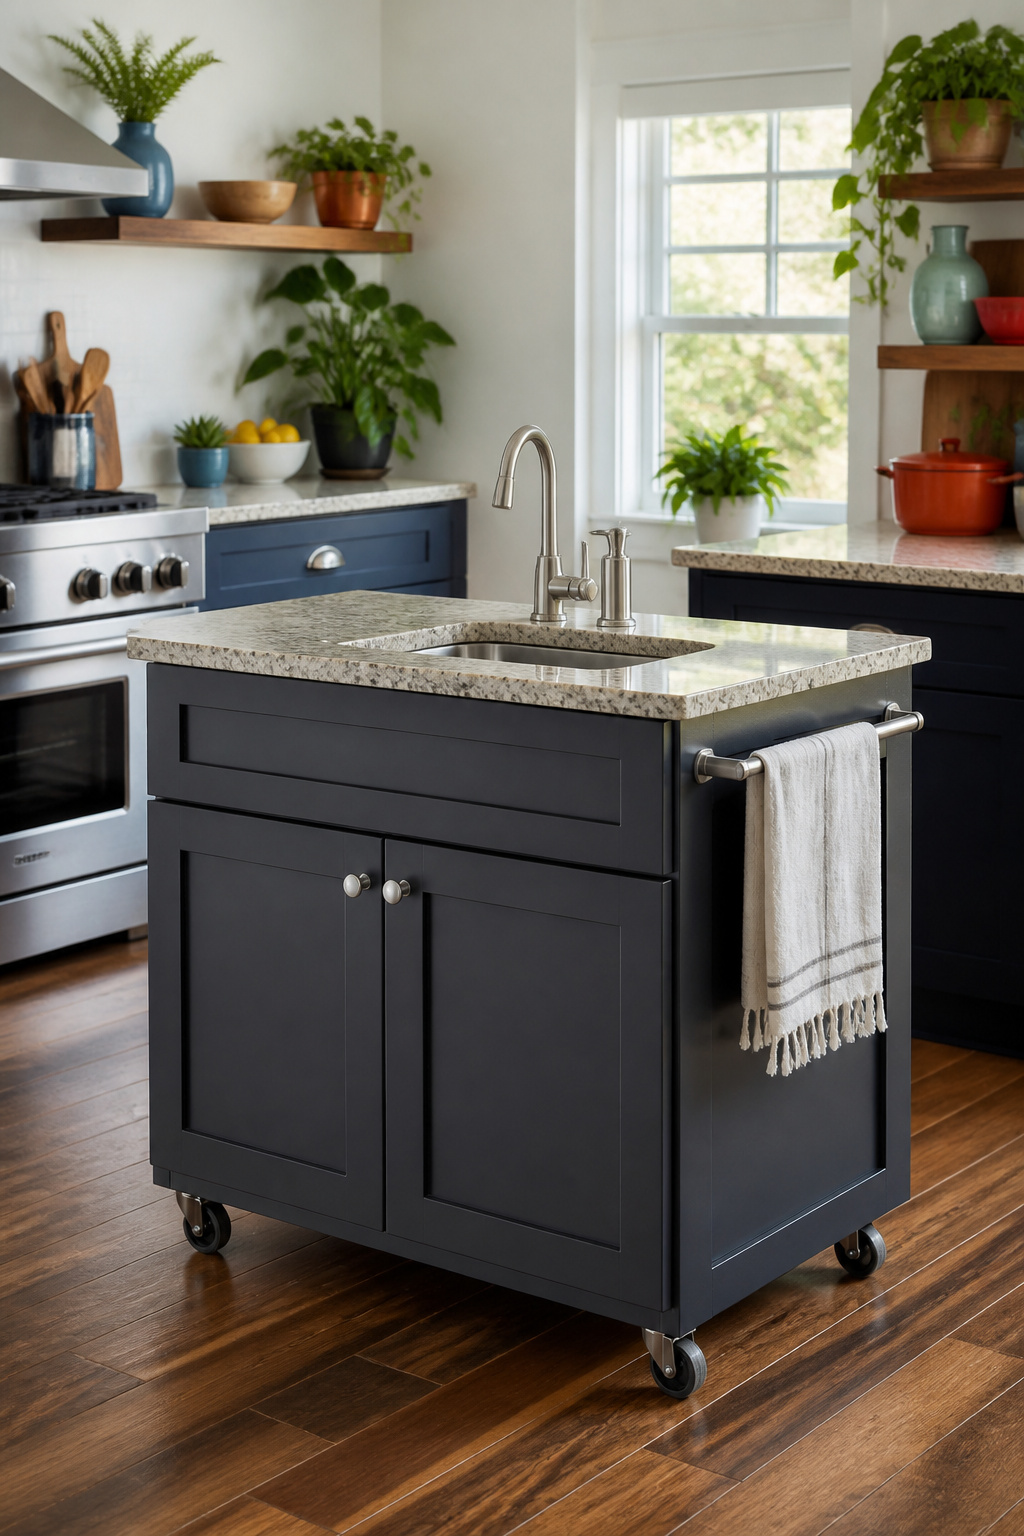
A rolling island with a sink sounds like the answer for kitchens that need the counter space back on weekends. Castor-mounted bases with quick-connect plumbing hoses let you wheel the unit to a wall or into a pantry when you are not cooking, which matters in studios or galley layouts where every square foot earns its keep. What convinced me, reading through a dozen of these builds, is that the idea only holds up if you respect the hardware.
Locking castors rated for wet weight are non-negotiable. Water plus a granite remnant top adds up fast, and standard furniture wheels flatten or snap under sustained load. The quick-connect fittings for the sink hoses also wear with cycles; each hookup and unhooking slowly fatigues the seal. This works beautifully for the occasional baker who wants island access twice a week. It fails for the daily-cook household where the sink runs constantly and the cart never actually moves. In that case you have built a stationary island on wobbly wheels, and the plumbing connection becomes the leak point you did not need.
Recommended Products

[ NSF Certified Commercial Grade ] - Crafted from high-quality stainless steel, this NSF-certified prep table is the ultimate solution for commercial kitchens, restaurants, and food trucks. Rust-resistant and easy to clean, it meets the strictest health standards, ensuring a sanitary workspace for all your food preparation needs.

Adjustable Table & Comfortable Work** Adjustable galvanized steel undershelf and 4 galvanized steel legs, you can freely change the height of the undershelf to suit your demands. Adjustable feet with a non-slip mat provide more stability. By casters (without casters), you can move it easily. Quick to assemble by instructions

High-Quality Stainless Steel: This work table, measuring 18 x 36 x 34 inch, is made from SUS201 stainless steel for the tabletop, shelves, and legs. It offers superior rust resistance, a sleek appearance, and a smooth surface that is easy to clean with a simple wipe. It meets strict public health standards, ensuring long-lasting protection for your health.
11. Use It as a Table
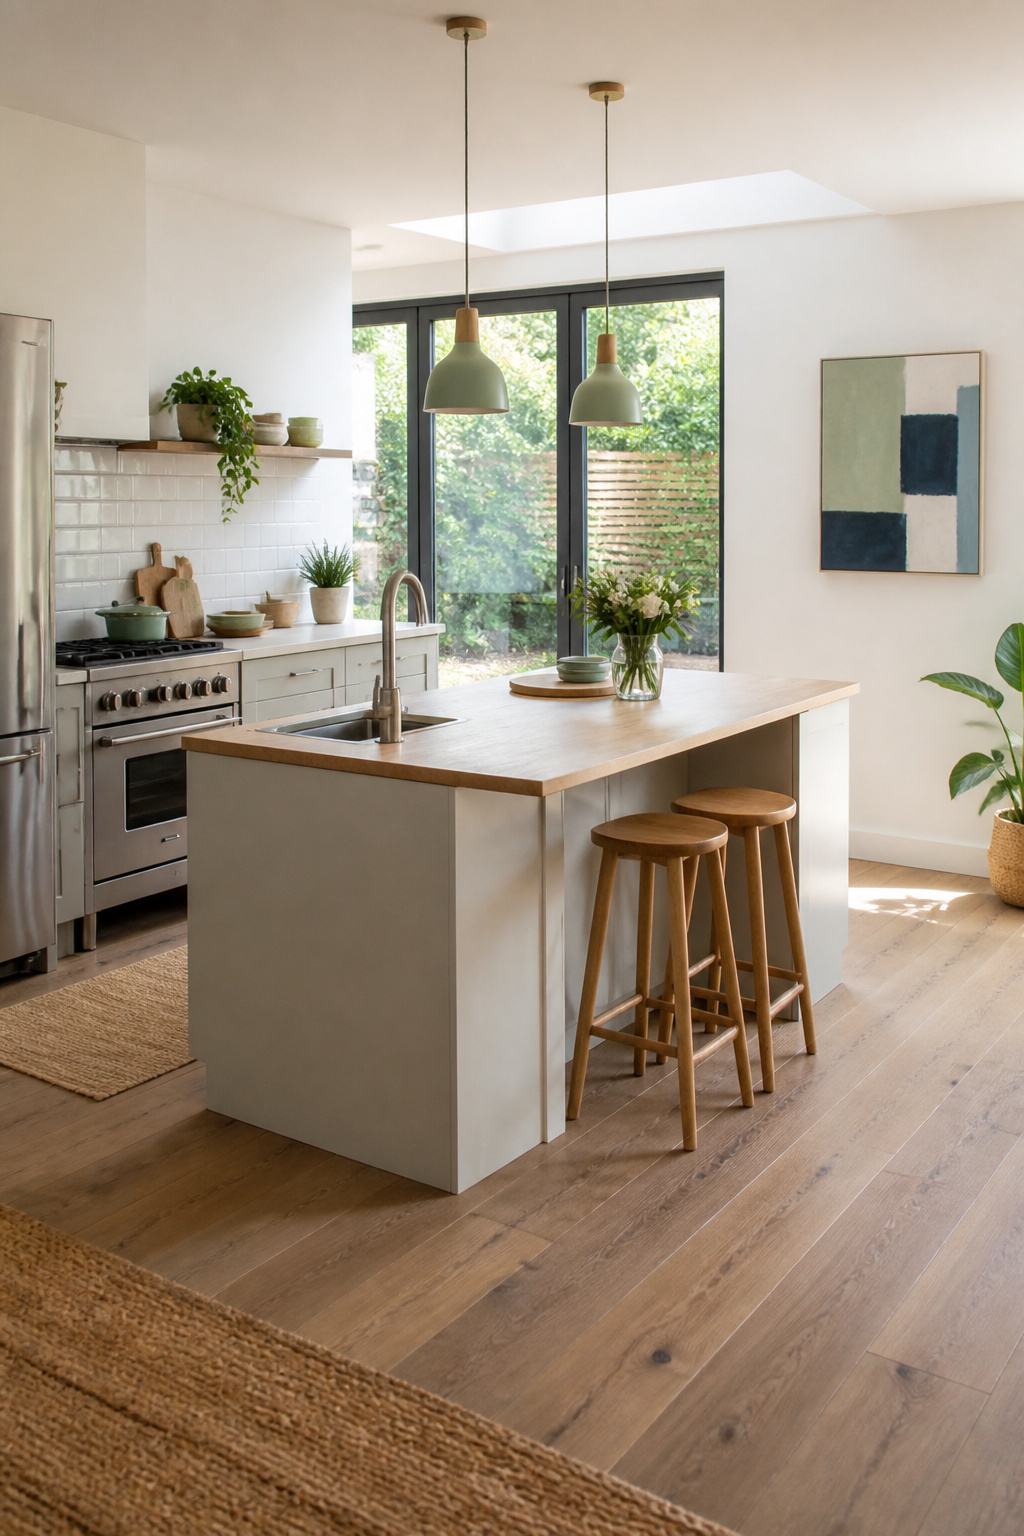
The sink at one end of a small island leaves the rest of the surface clean for seating, and that single placement decision is what makes prep-and-dine possible in a footprint that would otherwise force you to choose. A center sink breaks the run in half; you end up with two narrow ledges too cramped for plates or elbows. Push the basin to the short end, and the long edge stays open for a continuous counter or an overhang where stools tuck in.
I have watched this layout fail when the sink sits even six inches too far from the end. The remaining counter looks generous on paper, but the dishwasher box and plumbing chase eat into it from below, and suddenly your "dining zone" is a twelve-inch lip. Clara Jung’s narrow-island project handled this by treating the sink and the table as one continuous element, warm wood drawing the eye across both functions so the constraint reads as intentional, not apologetic. The working end stays contained, guests settle at the other, and nobody sits with their knees in the spray zone.
12. Stick With Neutrals
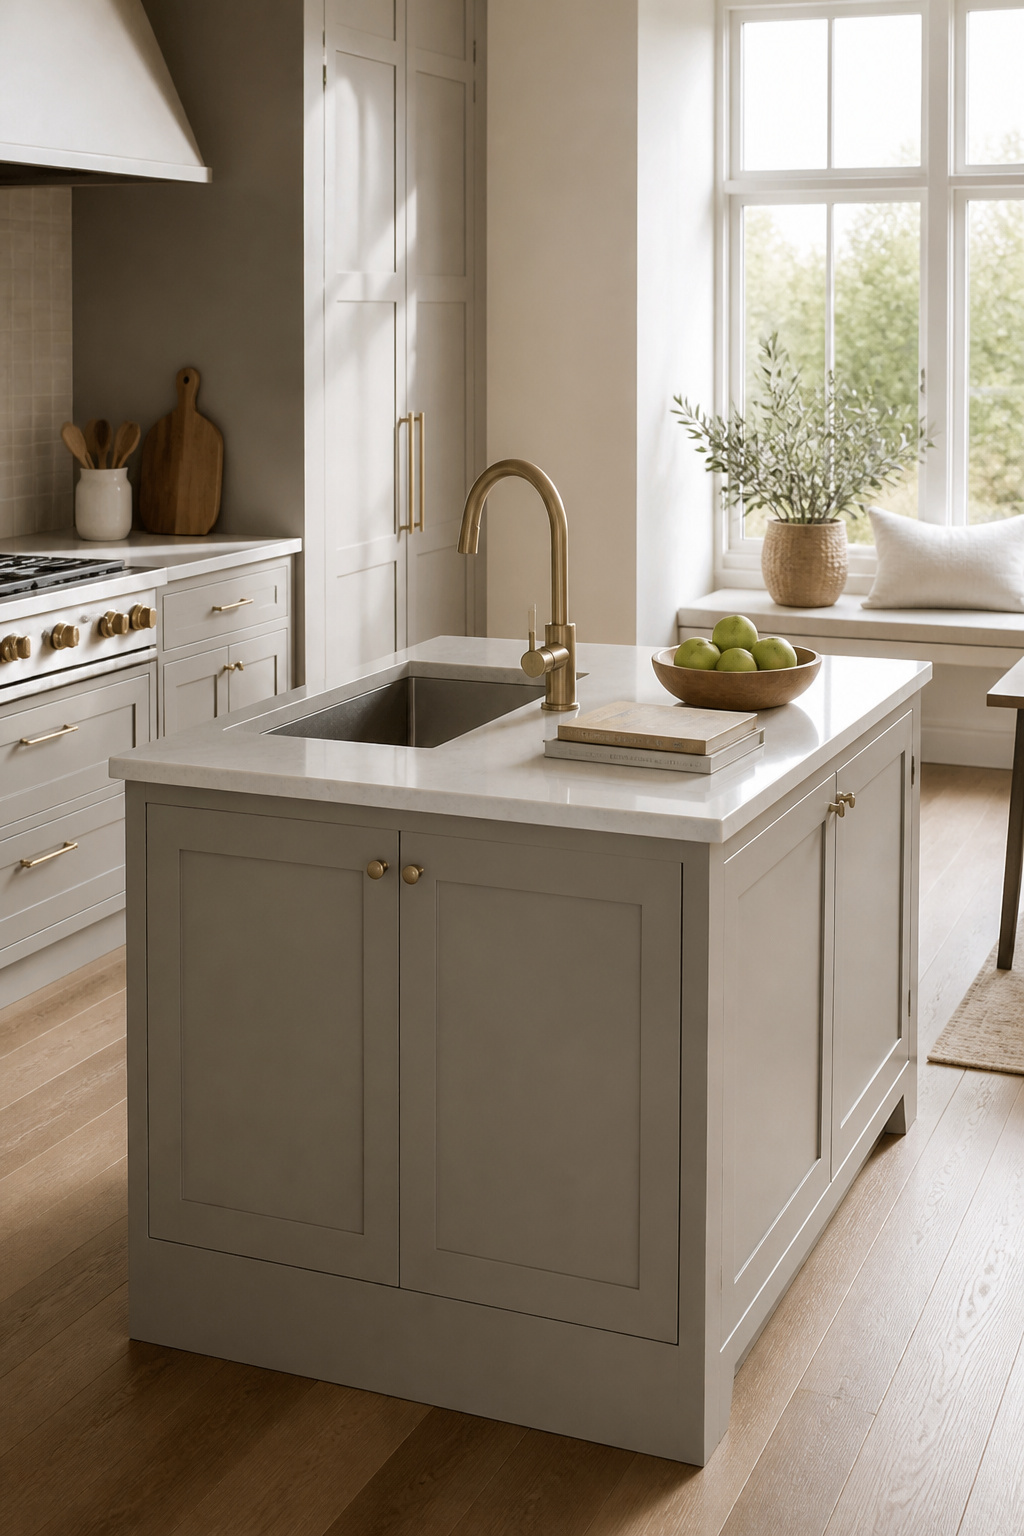
White, gray, and wood-tone islands have a way of stepping back so the kitchen itself reads as the room, not the furniture inside it. In a tight space, that visual quiet matters. The eye travels across uninterrupted planes instead of stopping at a single saturated block, so the whole layout feels a few inches larger than it measures.
The blue island I wrote about earlier does the opposite, and that is exactly the point. A bold color works when you want the island to act as the design statement, the thing that gives the kitchen its personality. That approach wins in a galley that otherwise has no detail, or when the rest of the finishes are builder-grade beige you cannot change.
For renters and first-time owners who are stuck with existing cabinets and flooring, the neutral island is usually the safer bet. It lets you add one coherent piece without fighting what is already bolted down. My own first island was a soft gray wash on birch, and the landlord’s orange-toned oak cabinets stopped screaming the moment I rolled it in. The gray did not match anything exactly, so it matched everything just enough.
13. Maximize Storage
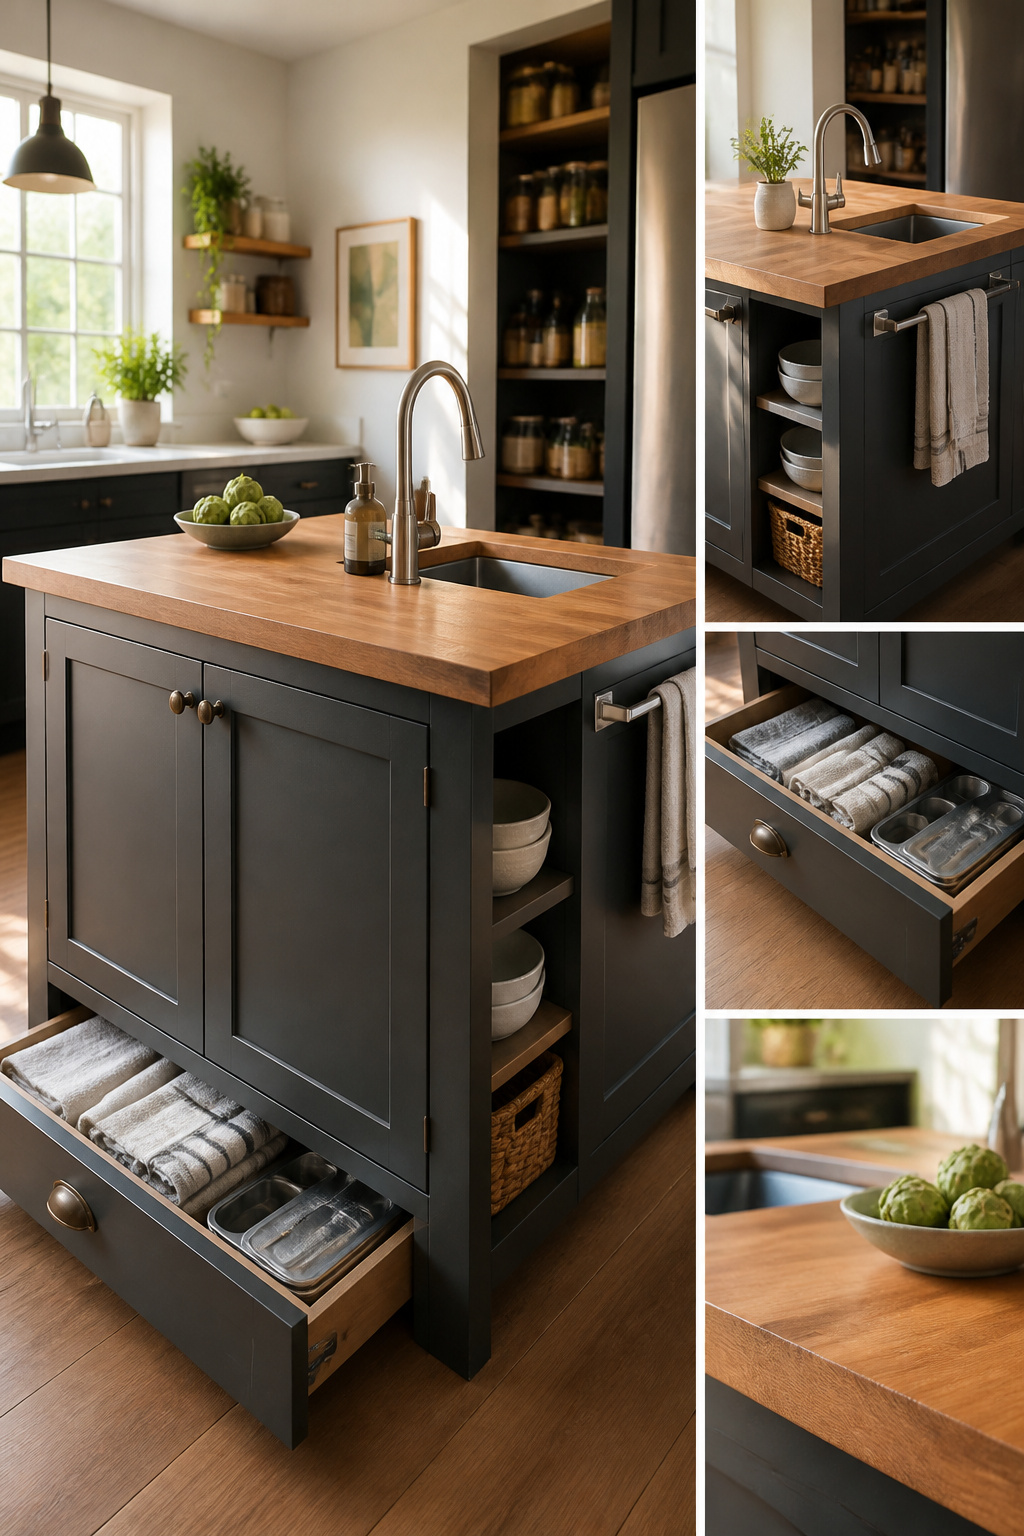
A toe-kick drawer at the sink island recovers the four inches most people write off as dead space. Mine would hold dish towels and the seldom-used roasting pan, not the everyday plates that belong in wall cabinets closer to the dishwasher. The priority at the island is whatever gets dirty at the sink: colanders, cutting boards, the knife slot that keeps the prep blade out of the drawer jumble. An appliance garage at the back of the island corrals the stand mixer or coffee maker that otherwise colonizes counter space. Towel bars on the end panel beat rummaging through a drawer with wet hands. Above, a ceiling-mounted pot rack frees wall cabinets for the pantry goods and lidded containers that dust would settle on if left open. The rule is wet work and daily tools at the island, dry storage and backups on the wall.
14. Incorporate Shelving
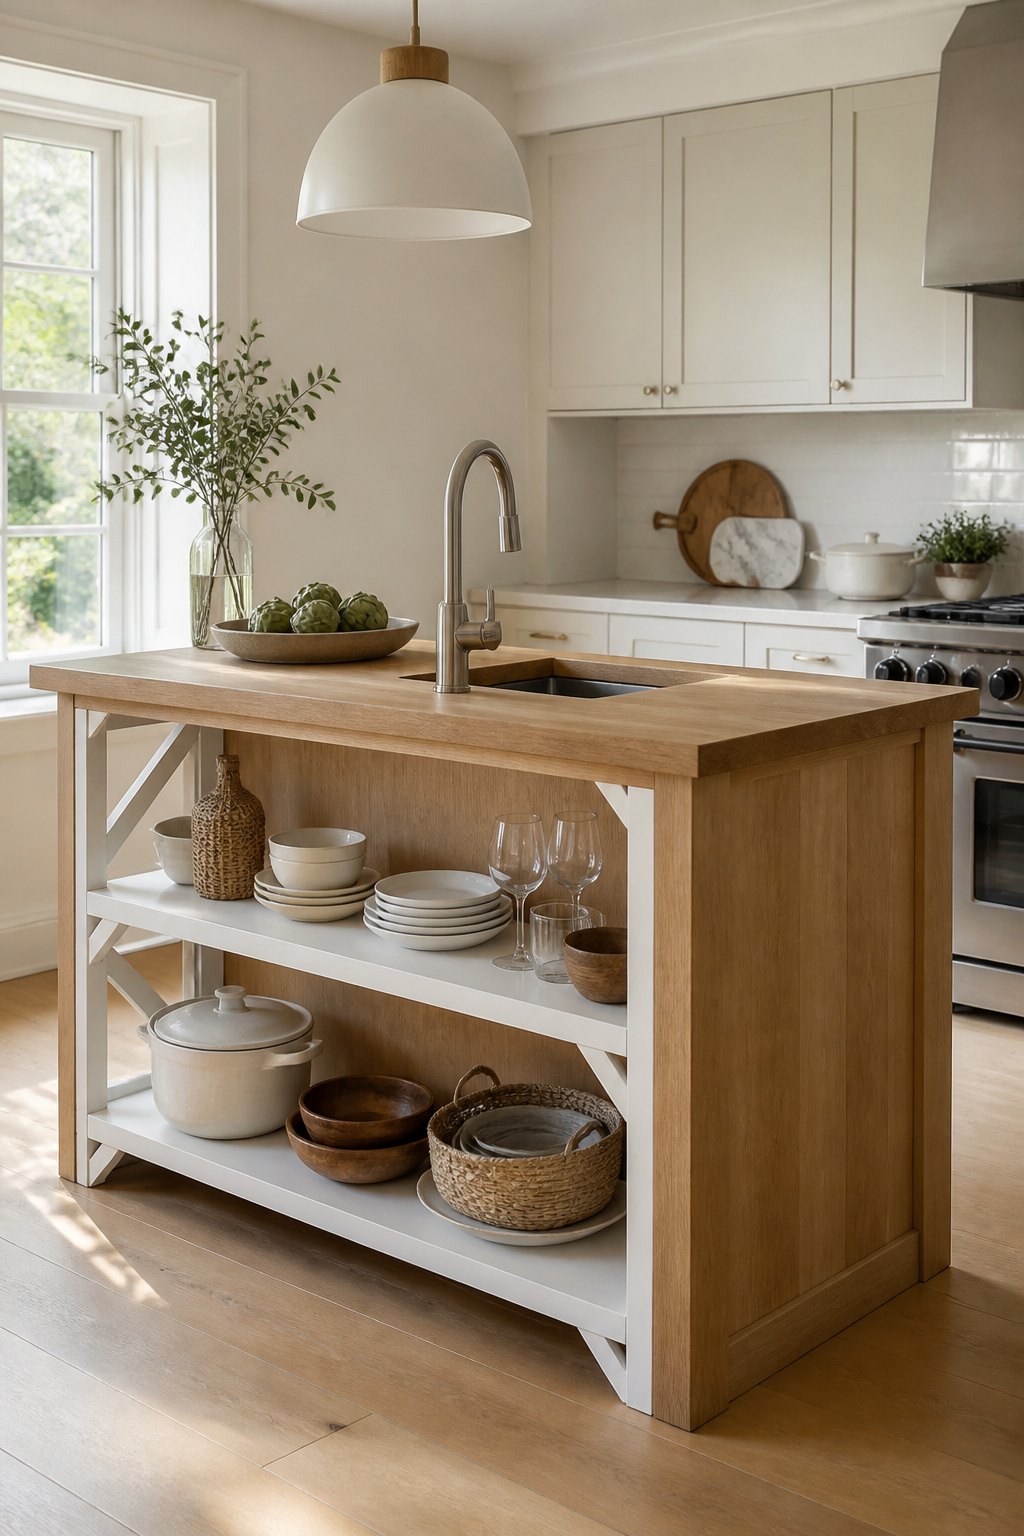
Open shelving on a small kitchen island with sink ideas keeps the footprint visually lighter than a row of solid cabinet doors. I learned this the hard way after installing a base cabinet with full panels on a 36-inch island; the blocky mass made walking around it feel like squeezing past furniture in a hallway. Swapping the front panel for two open shelves changed the whole flow. Shelf depth on a compact island usually runs 10–12 inches, deep enough for a stack of dinner plates or a row of pint glasses without the projection stealing knee room at the seating overhang.
What sits there matters. Everyday dishes and glassware make sense because you reach for them constantly; the open storage earns its keep. Reserve the closed side, if there is one, for the ugly stuff: the dish soap refills, the compost bin, the tool drawer. A matching set of white coupe plates or clear tumblers reads as intentional, almost decorative, while mismatched plastic containers read as clutter you ran out of room for. If your dish collection is currently the latter, open shelving is a forcing function to edit it down, or at least to commit to one color family that looks like a choice.
15. Tuck in the Stools
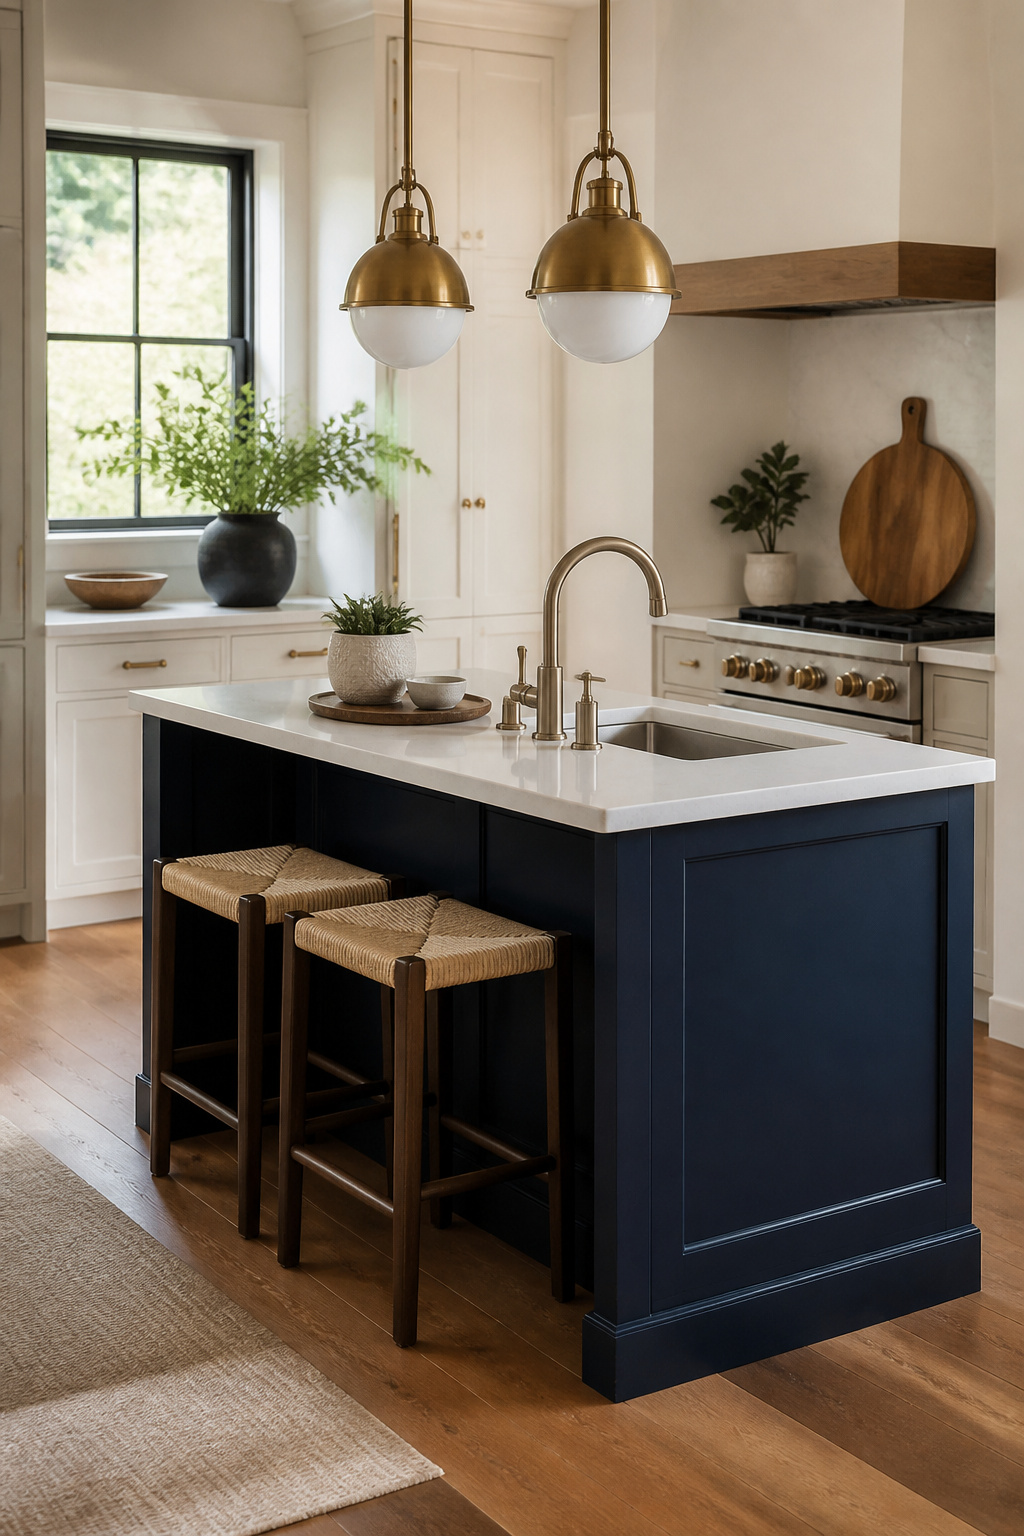
Backless stools that slide flush under the counter edge buy back the floor space a kitchen island with sink already eats up. A stool with even a low back always protrudes six to ten inches past the counter, which turns a narrow aisle into a traffic jam every time someone walks through with groceries. The trade is comfort: a back lets you settle in for a long coffee, while a backless perch keeps you upright and ready to move.
The overhang depth has to account for 9 to 13 inches of knee clearance if you want the stools to actually tuck in. That means the counter extends past the cabinet box by more than most people guess, so a 24-inch-deep island body needs roughly 36 inches total depth to seat someone without their knees knocking the panel underneath. In a compact kitchen, those extra inches come from somewhere, usually walkway width on the cooking side. I would rather lose six inches of floor space and gain the ability to walk past without turning sideways.
16. Have Dinner for One
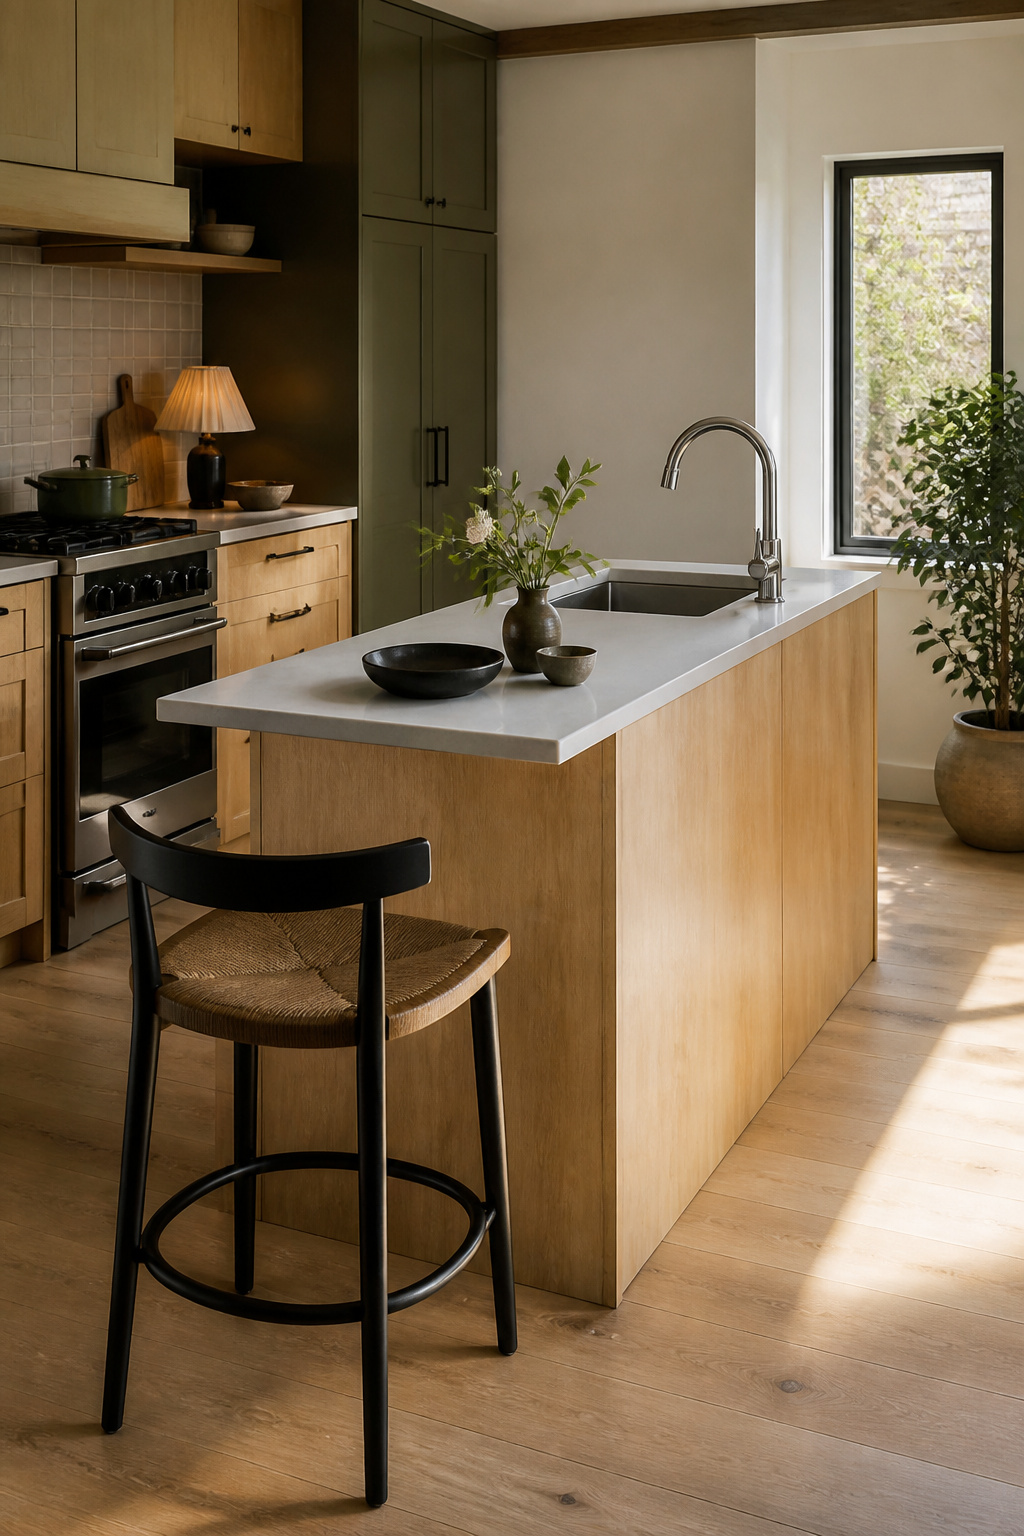
A 12-15 inch overhang at one end of the island gives just enough room for a single stool, nowhere near full dining but exactly right for morning coffee or a late dinner alone. The working side still holds the sink and maybe a slim drawer for sponges. In a studio where every square foot pays rent, that overhang beats a table because it does not exist as a separate object with its own legs, its own footprint, its own pile of mail.
The stool tucks underneath when you stand up, and the kitchen returns to being a walkway. An 18-inch width for that overhang section keeps the whole island narrow enough that two people can still pass, one at the cooktop and one at the sink. I have seen wider overhangs in showrooms that look generous until you try to open the dishwasher behind the seated person and the whole geometry falls apart.
For renters, this layout matters because the island can be a freestanding piece you take with you. The single-seat end does not need structural support into the floor like a permanent breakfast bar. A simple corbel or two under the counter lip handles the load, and patching two screw holes beats explaining a dropped ceiling beam to a landlord.
17. Embrace Vintage Furniture
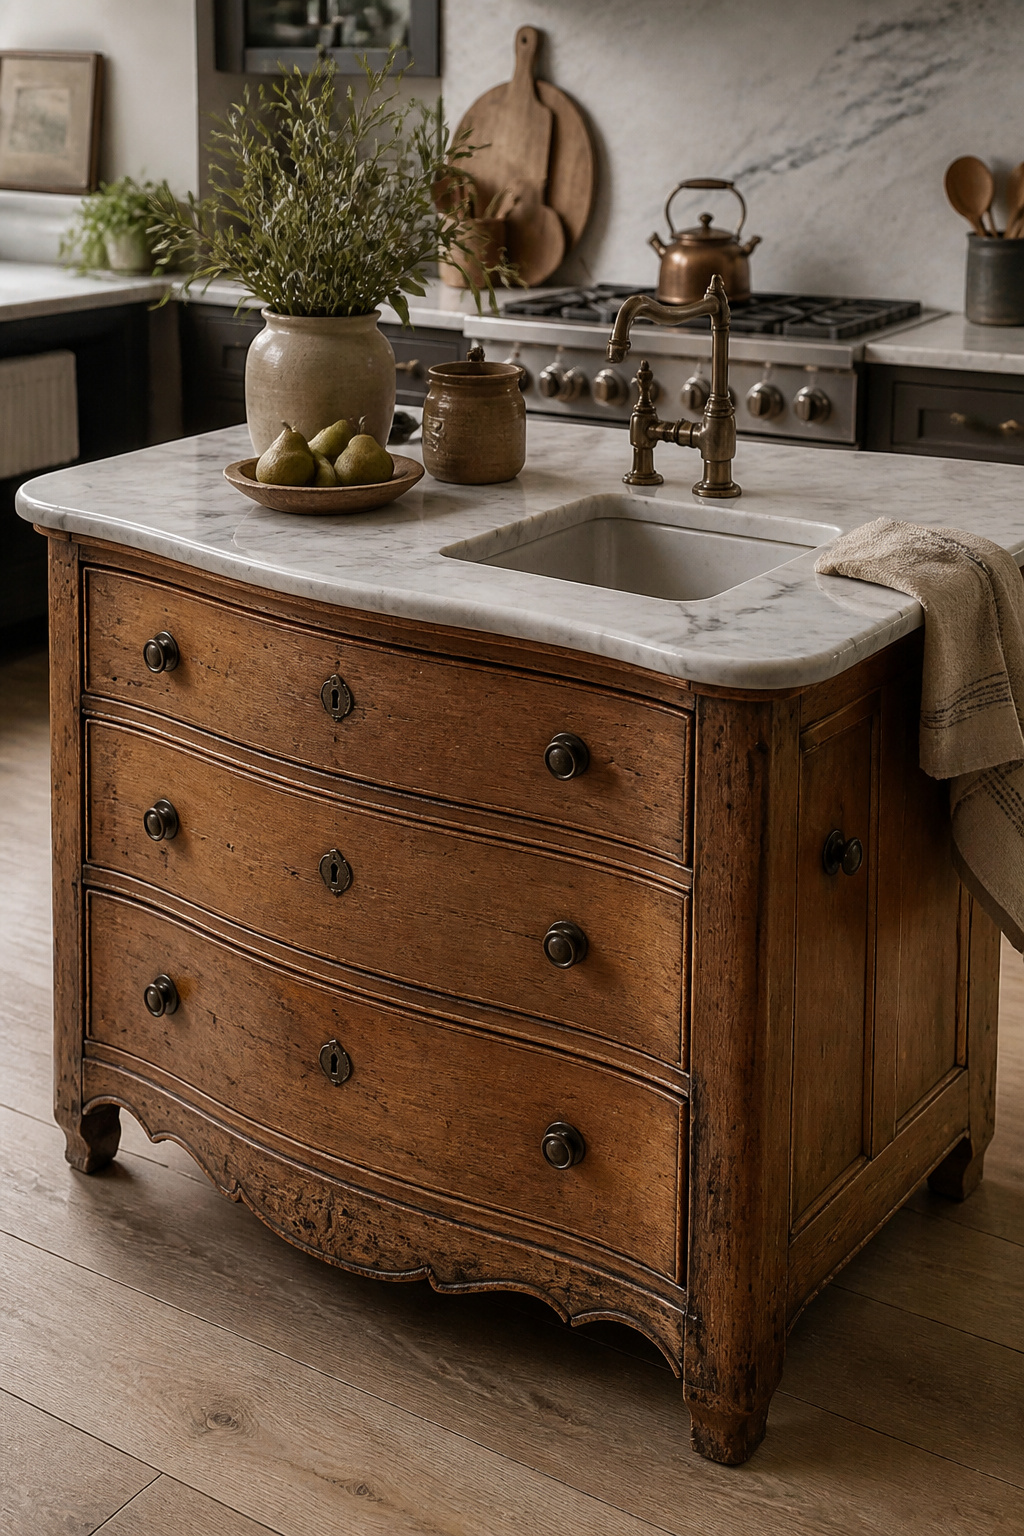
A 19th-century cast-iron stove topped with Carrara marble makes a kitchen island that actually holds up to daily use, but the weight is the first thing to plan for. Stone that heavy needs reinforcement beneath, and the legs or frame of any antique piece will need inspection for rot, rust, or old repairs before you commit. I have passed on two beautiful sideboards after finding the joints too soft to trust with a sink basin and a full counter load.
Cutting for plumbing is where the patina story gets complicated. A farmhouse sink with its gold hardware looks right at home against aged wood, yet the drain line and supply holes have to go somewhere precise. The back panel or top of a dresser usually takes the cut, and that surface will not heal the way new lumber might. The contrast with modern kitchens is the payoff: warm, worn surfaces against sleek appliances read intentional, not mismatched, when the proportions stay tight enough for a small footprint. One London kitchen lines the walls with 19th-century Portuguese tiles and hangs an early-20th-century French pendant above the island; the eras layer without fighting because each piece earned its place through scale, not shouting. Plan the plumbing path before you buy the piece, since a center drain on a dresser with drawers demands either losing the drawer entirely or building a false front that costs you real storage.
18. Go for the Diagonal
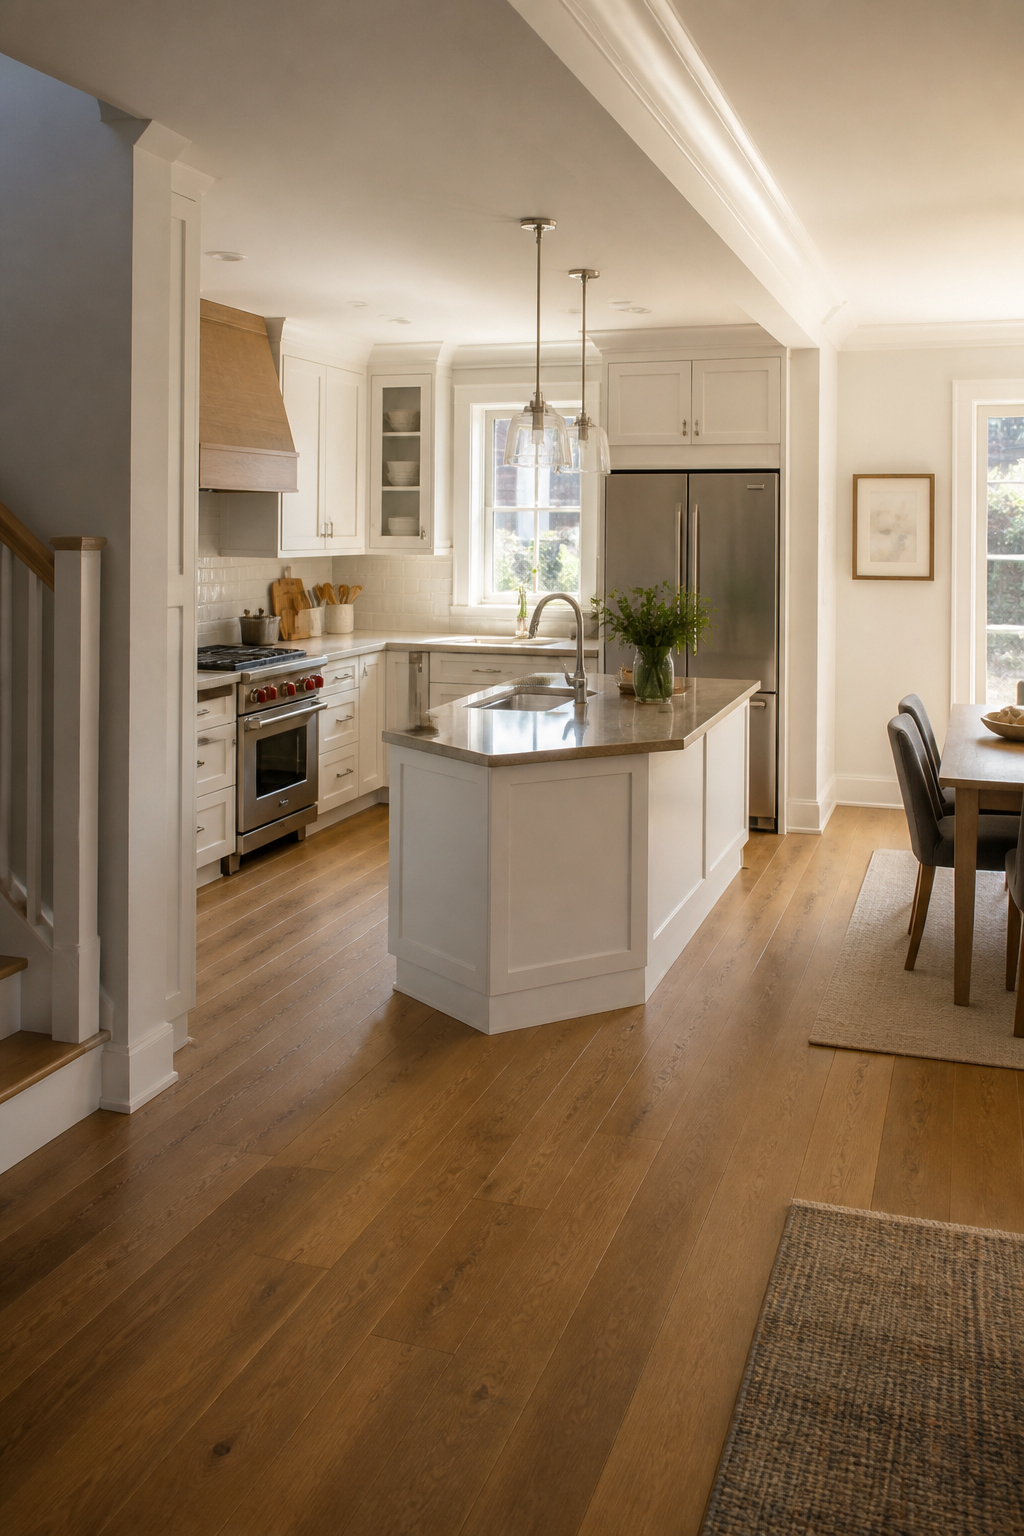
A diagonal island turns the longest edge of a galley or L-shaped kitchen into usable space instead of a hallway wall. By rotating the unit forty-five degrees, the corners open up walking paths that feel wider than the floor plan suggests, because you’re no longer squeezing between two parallel surfaces.
The sink placement matters more with this angle than it would on a straight run. Set it toward the corner that faces the main work triangle, and you can approach from the stove side or the refrigerator side without another cook blocking your path. I looked at a lot of compact kitchen layouts where the diagonal island became the only spot two people could prep at once, simply because the sink wasn’t pinned against a single wall.
The tradeoff is counter space: you lose the long continuous stretch a rectangle gives you, and the back corner can turn into dead storage unless you plan for it. A corner cabinet on the island’s inside angle, or a tilted cutting board that follows the same line, pulls that space back into use. Most renters I see doing this build the island on locking casters so the landlord’s existing layout stays intact, but the diagonal still reads as built-in once it’s positioned.
19. Incorporate Wine Storage
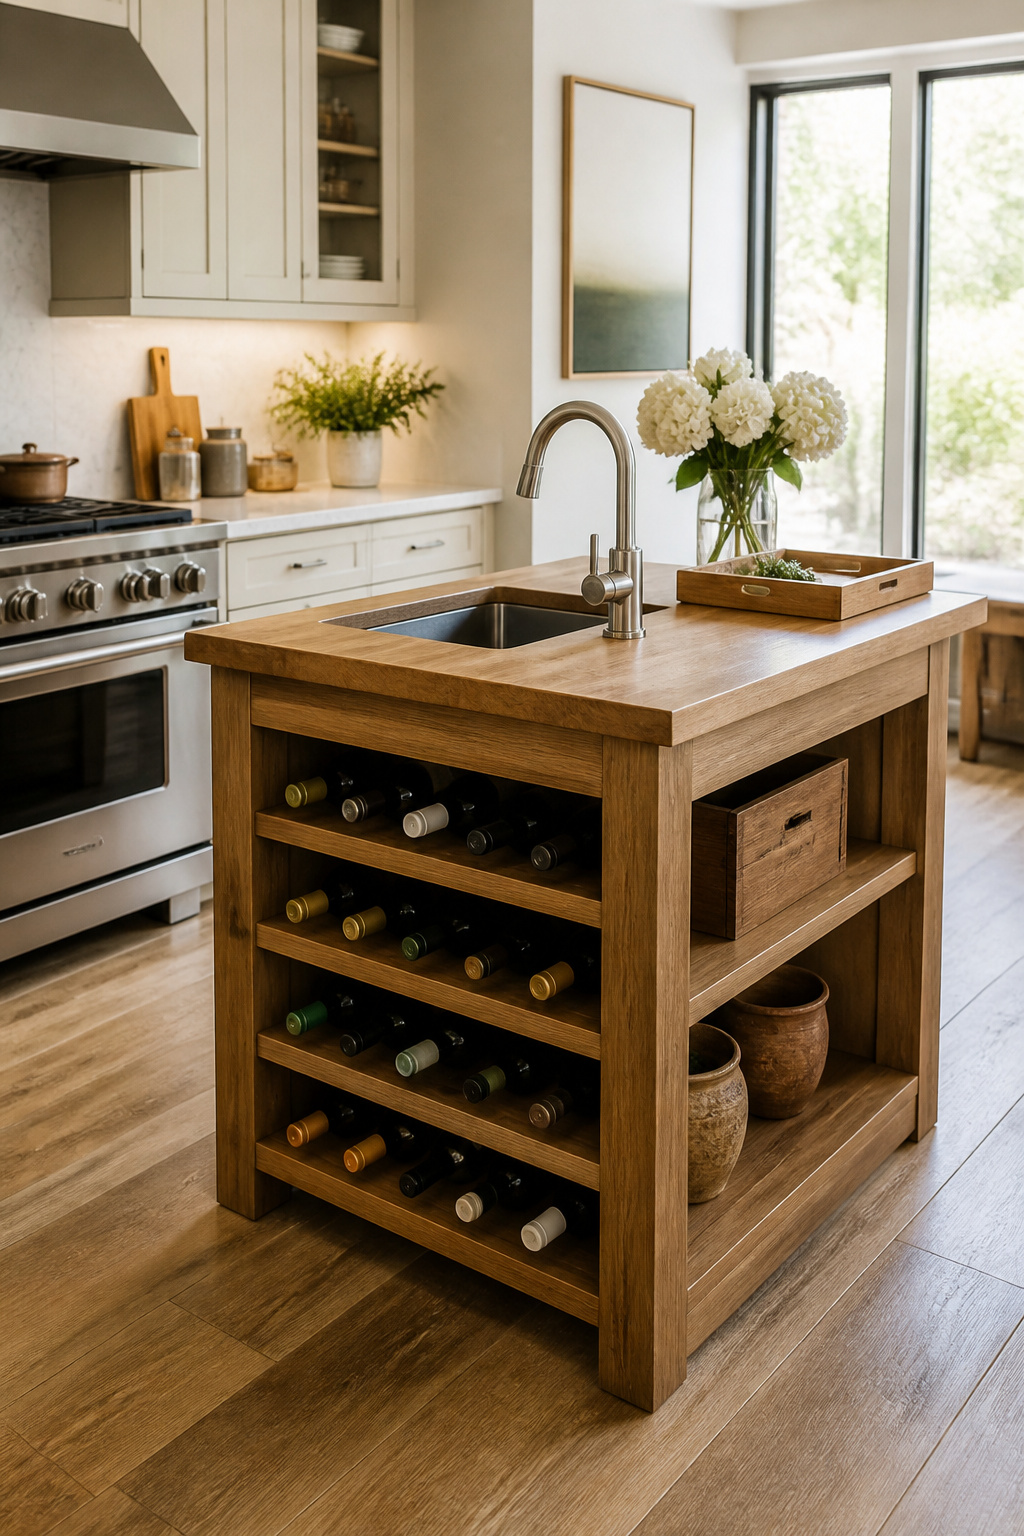
Built-in wine storage at a small kitchen island with sink ideas usually means racks or refrigerator drawers tucked into the base. The racks keep bottles horizontal and reachable without adding a separate piece of furniture, which matters when floor space is already tight.
The catch is the plumbing. The sink needs a drain line and often a vent running down through the cabinet, and that hardware crowds the same zone where a wine refrigerator wants to sit. A 9 to 15 inch compact bar sink leaves limited room underneath, so most small islands handle this by keeping wine storage as dry racks positioned away from the wet wall. Refrigerator drawers are possible, but they need a dedicated electrical circuit in addition to the plumbing rough-in, which drives up cost and complexity fast. Temperature is the other issue: the warmth and humidity near a sink run counter to what wine wants, so dry storage ends up the practical choice even when the budget allows for more.
20. Add Another Sink
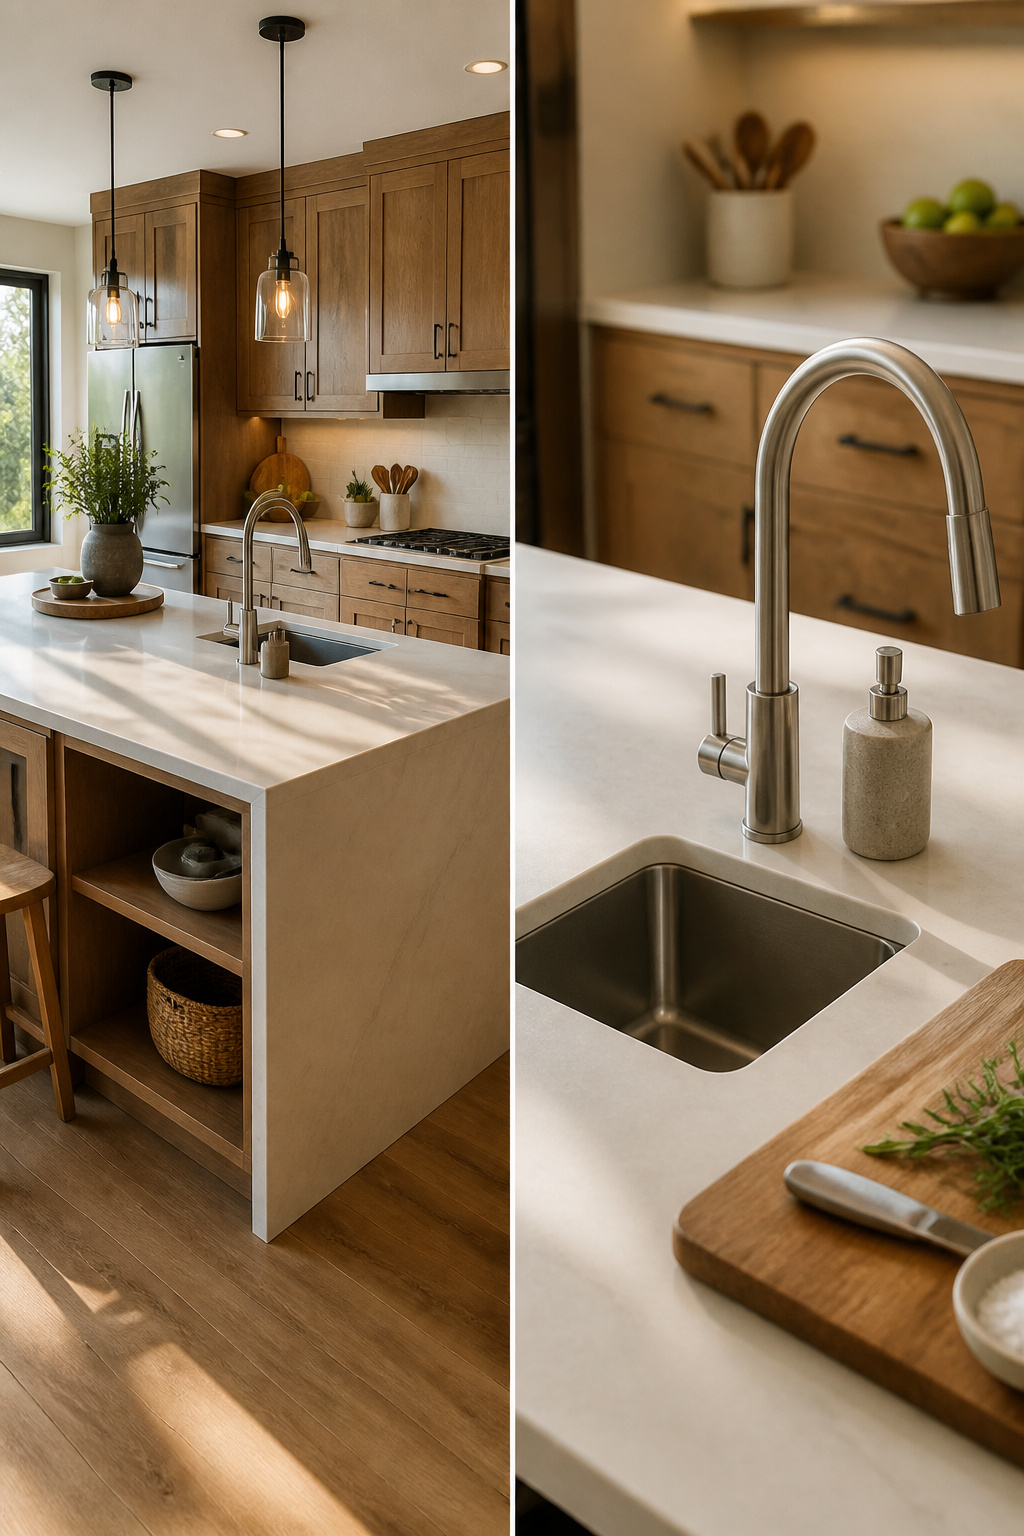
A secondary sink on the island keeps the main sink free for dishes while someone else rinses vegetables or washes hands. The island basin is typically smaller, often 15 to 18 inches wide, which is enough for prep work without eating the counter space you need for chopping boards and bowls.
Splitting the workflow this way matters most when two people cook together, or when you entertain and guests drift toward the island with wine glasses that need a quick rinse. The main sink stays dedicated to pots and pans, and traffic spreads out instead of stacking at one spot.
The tradeoff is plumbing. Running supply lines and a drain to the island costs more than a standard installation, and in some layouts the floor joists fight you. If your kitchen sits on a slab, that cost climbs higher. For renters, this is usually a non-starter unless the landlord already roughed in the lines.
Sink Types That Fit Small Islands
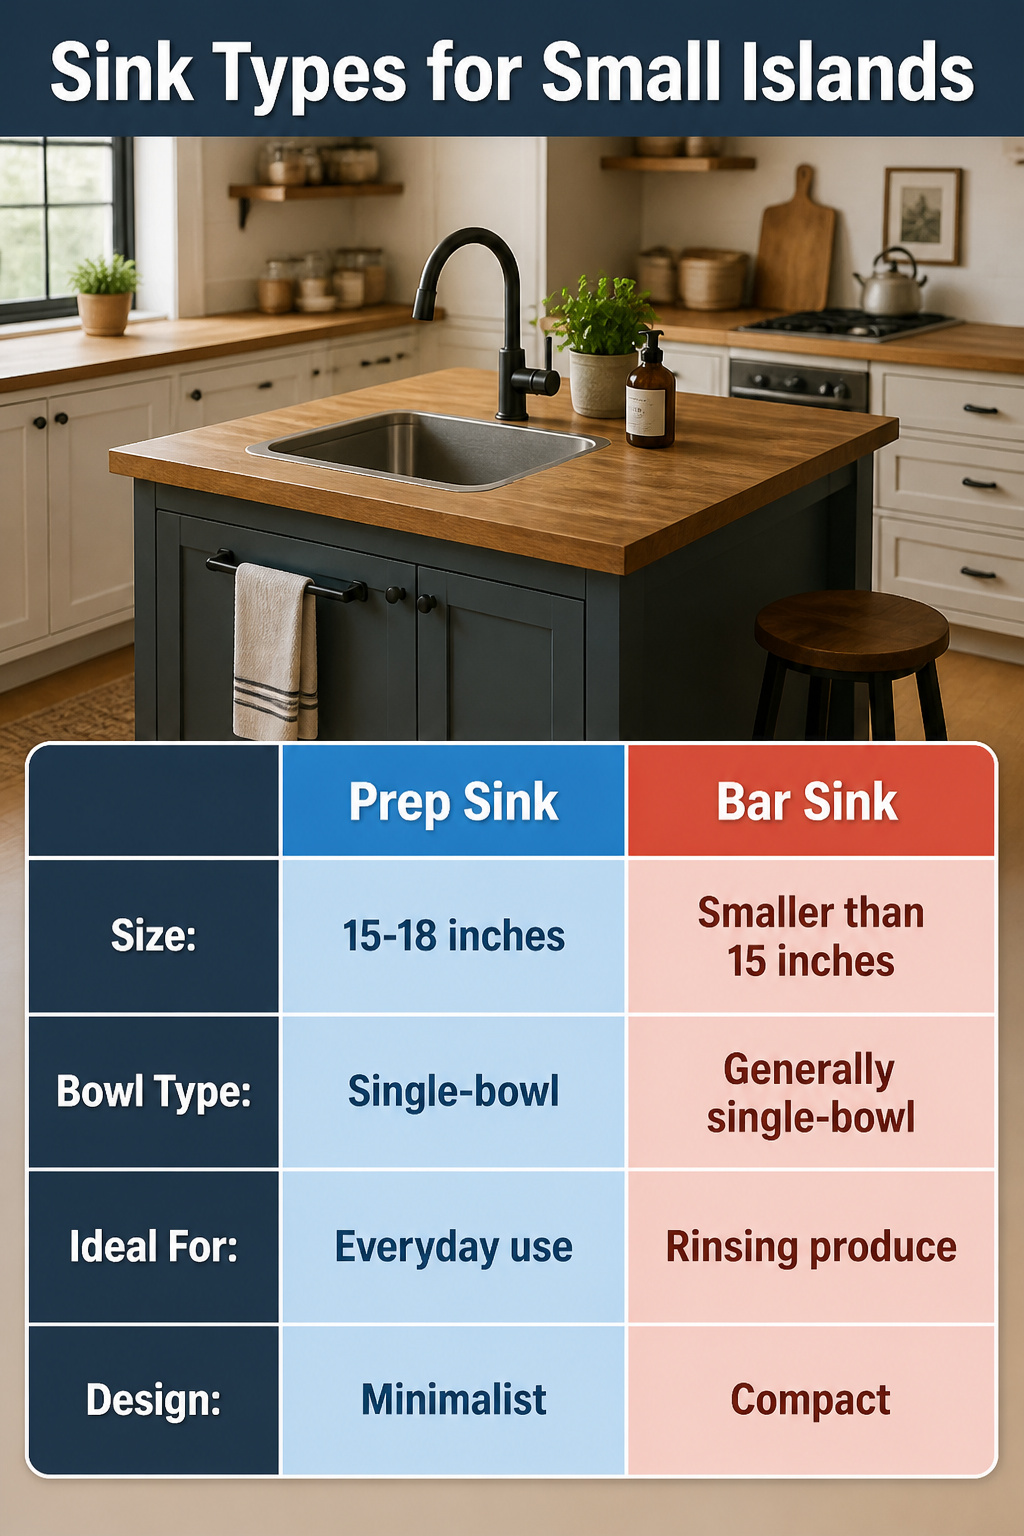
Prep sinks in the 15- to 18-inch range are the practical choice for a compact island, and bar sinks run even smaller if you only need to rinse produce or fill a pitcher. A single-bowl sink leaves more flat counter for staging than a double-bowl, which matters when your total surface is already tight. Farmhouse apron fronts demand 30 to 36 inches of width and need the island to stretch at least 60 inches long to keep usable counter on both sides, plus custom framing in the base cabinet to carry that exposed front. The look reads furniture-style, which is why it works on an island built from a repurposed base cabinet, but the footprint is a real trade. I would skip the apron front in anything under five feet and put the saved inches toward landing space. If you are converting an IKEA base cabinet or similar, a top-mount bar sink drops in without the structural rework an apron front requires, and the butcher-block top you add can overhang for seating without fighting the sink rim.
Materials Compared
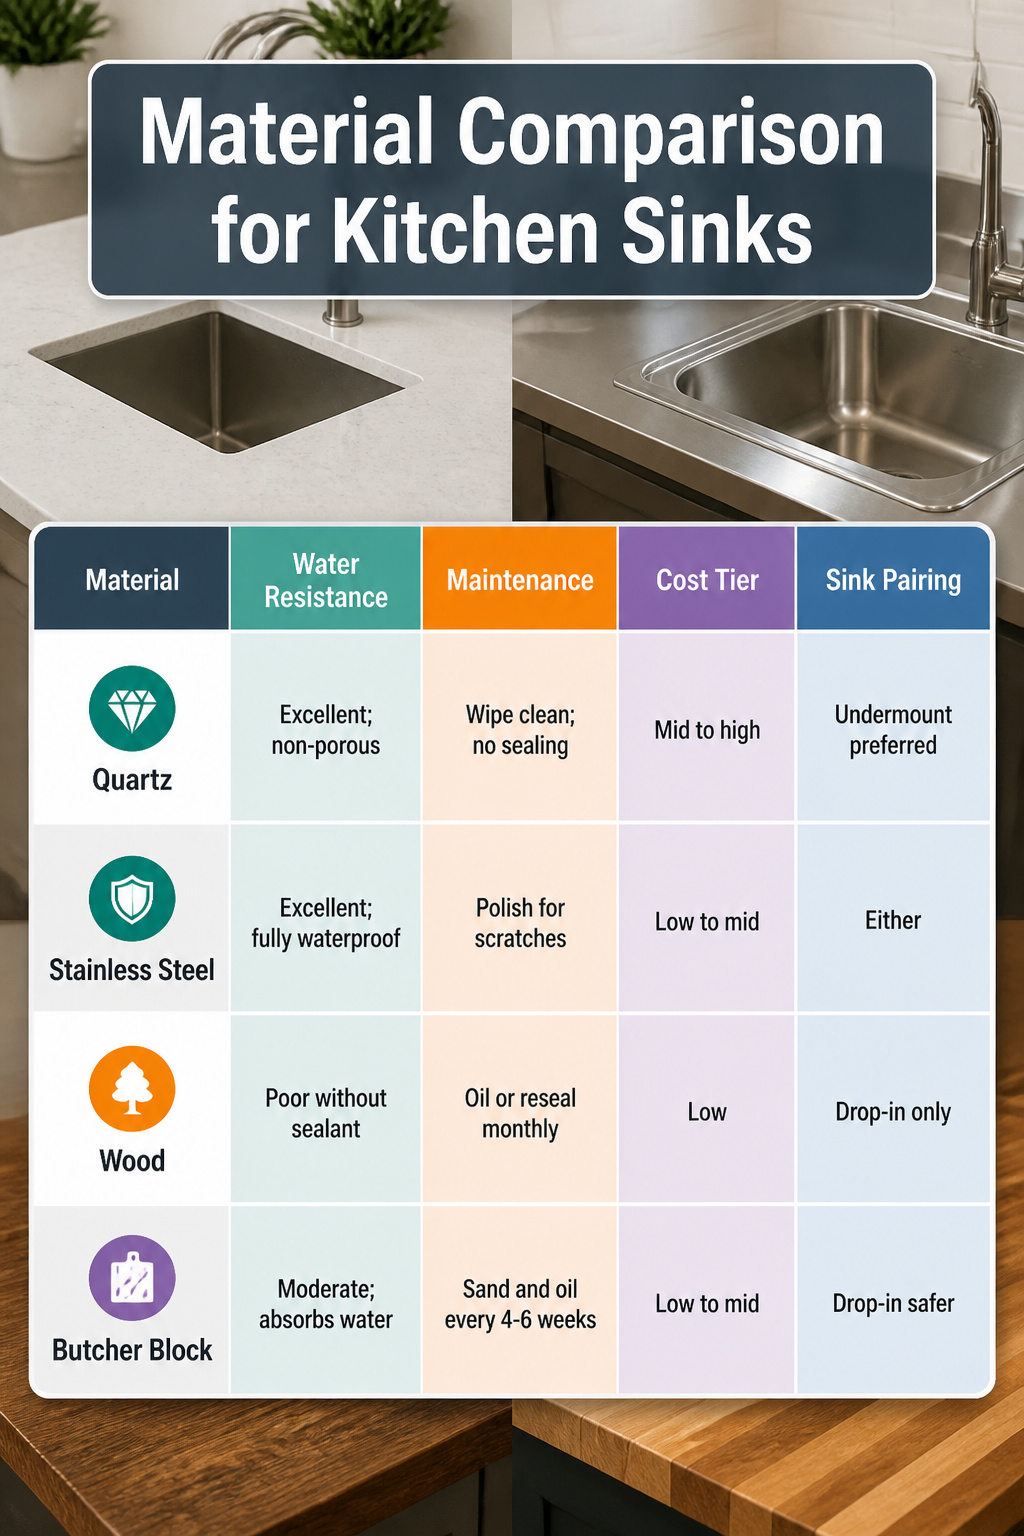
Quartz and stainless steel handle the wet zone around a sink without much drama, while wood and butcher block demand more attention to stay flat and unmarked. That split matters when you’re choosing between an undermount sink, which leaves a raw edge exposed, and a drop-in, which covers its rim.
| Material | Water Resistance | Maintenance | Cost Tier | Sink Pairing |
|---|---|---|---|---|
| Quartz | Excellent; non-porous | Wipe clean; no sealing | Mid to high | Undermount preferred for seamless drain board |
| Stainless steel | Excellent; fully waterproof | Polish for scratches; easy sanitize | Low to mid | Either; drop-in common on prefab units |
| Wood | Poor without sealant | Oil or reseal monthly; wipe spills fast | Low | Drop-in only; undermount risks swelling at exposed edge |
| Butcher block | Moderate; absorbs standing water | Sand and oil every 4–6 weeks | Low to mid | Drop-in safer; undermount needs marine-grade finish |
I would skip wood entirely for an island sink that sees daily use. The maintenance rhythm is relentless, and one forgotten puddle warps the grain. Butcher block works if you genuinely enjoy the oiling ritual and keep a dish mat in the wet zone. For renters or anyone who cooks daily, quartz with an undermount gives the cleanest look and the least upkeep, though it costs more upfront. Stainless steel on a drop-in keeps the budget tight and holds up to abuse, but the industrial look isn’t for every kitchen.
What Size Island Your Kitchen Can Actually Fit
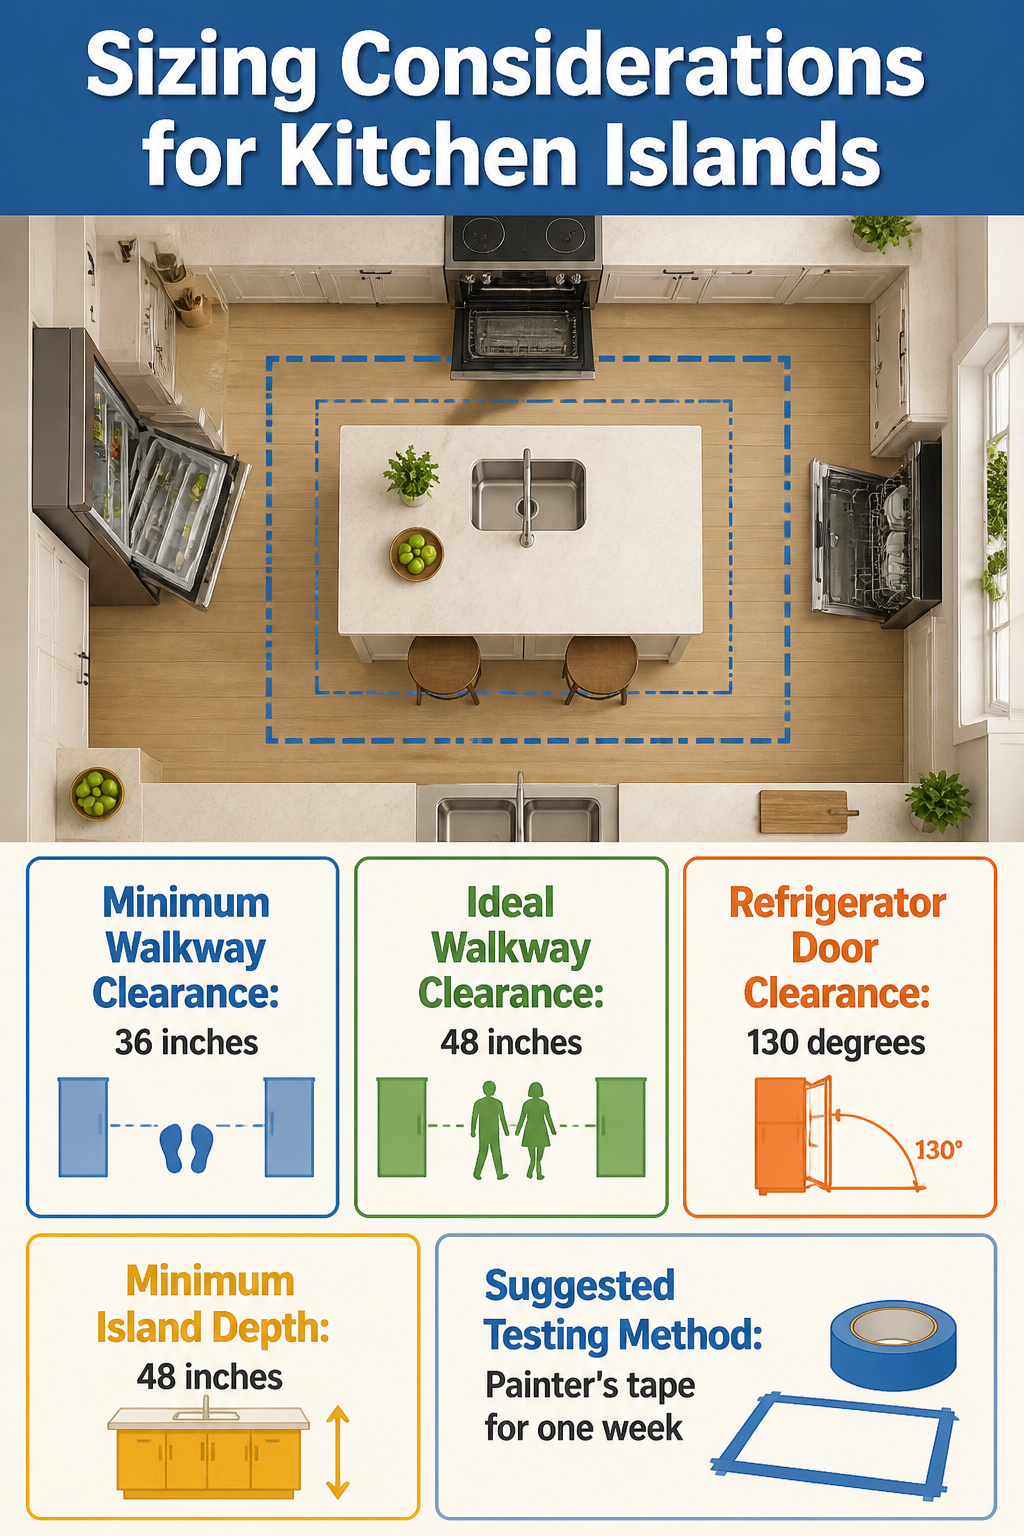
A kitchen island with a sink only works if you can still open the oven, the dishwasher, and the refrigerator without dodging around it. 36 inches is the bare minimum walkway clearance on all sides, and 48 inches is what you actually want if two people ever pass through while one is at the sink. I learned that the hard way during my last rental renovation, when I taped out a 24-by-48-inch island footprint and realized the dishwasher door trapped me in the corner.
Door swing arcs are the detail that kills most small-island plans. A standard refrigerator door needs about 130 degrees of clearance, and a dishwasher drops down, not out, but still blocks the aisle. Measure with the doors actually open, not just with the unit sitting there closed.
The 48-inch functional minimum matters most when the island houses a sink. You need landing space on both sides of the basin, and the plumbing chase eats depth from the cabinet. If your taped outline leaves you with less than 48 inches between facing counters, the sink idea should probably go. A prep surface with storage underneath survives a tighter fit; a sink does not, because the plumbing does not bend to save space.
The safe way to test this is painter’s tape on the floor for a full week. Cook dinner, load groceries, let the dog through. If you step around the tape even once, that is your answer before you spend money on cabinets.
Frequently Asked Questions
Is placing an island in a small kitchen a good idea?
Yes, if you need extra prep space, storage, or a spot to gather. A small kitchen island with sink ideas can serve as a workspace, dining ledge, or focal point in a tight layout. If permanence worries you, a rolling island with quick-connect plumbing lets you reclaim floor space when needed.
How can you maximize space with a small kitchen island?
Build in storage on both sides, add a toe-kick drawer, and keep the sink compact so counter space survives. Open shelving reads lighter than solid cabinets, and a 12–15 inch overhang buys seating without widening the footprint. A workstation sink with built-in colander ledges collapses the need for landing area beside the basin.
What can I do with a small kitchen island?
Use it for food prep, light dining, or as a mobile station you roll aside. The article covers islands that double as tables, vintage furniture pieces, or narrow 24–30 inch footprints with just enough room for a bar sink and a cutting board. Add bistro stools that tuck flush and the same piece handles morning coffee without becoming a second table.